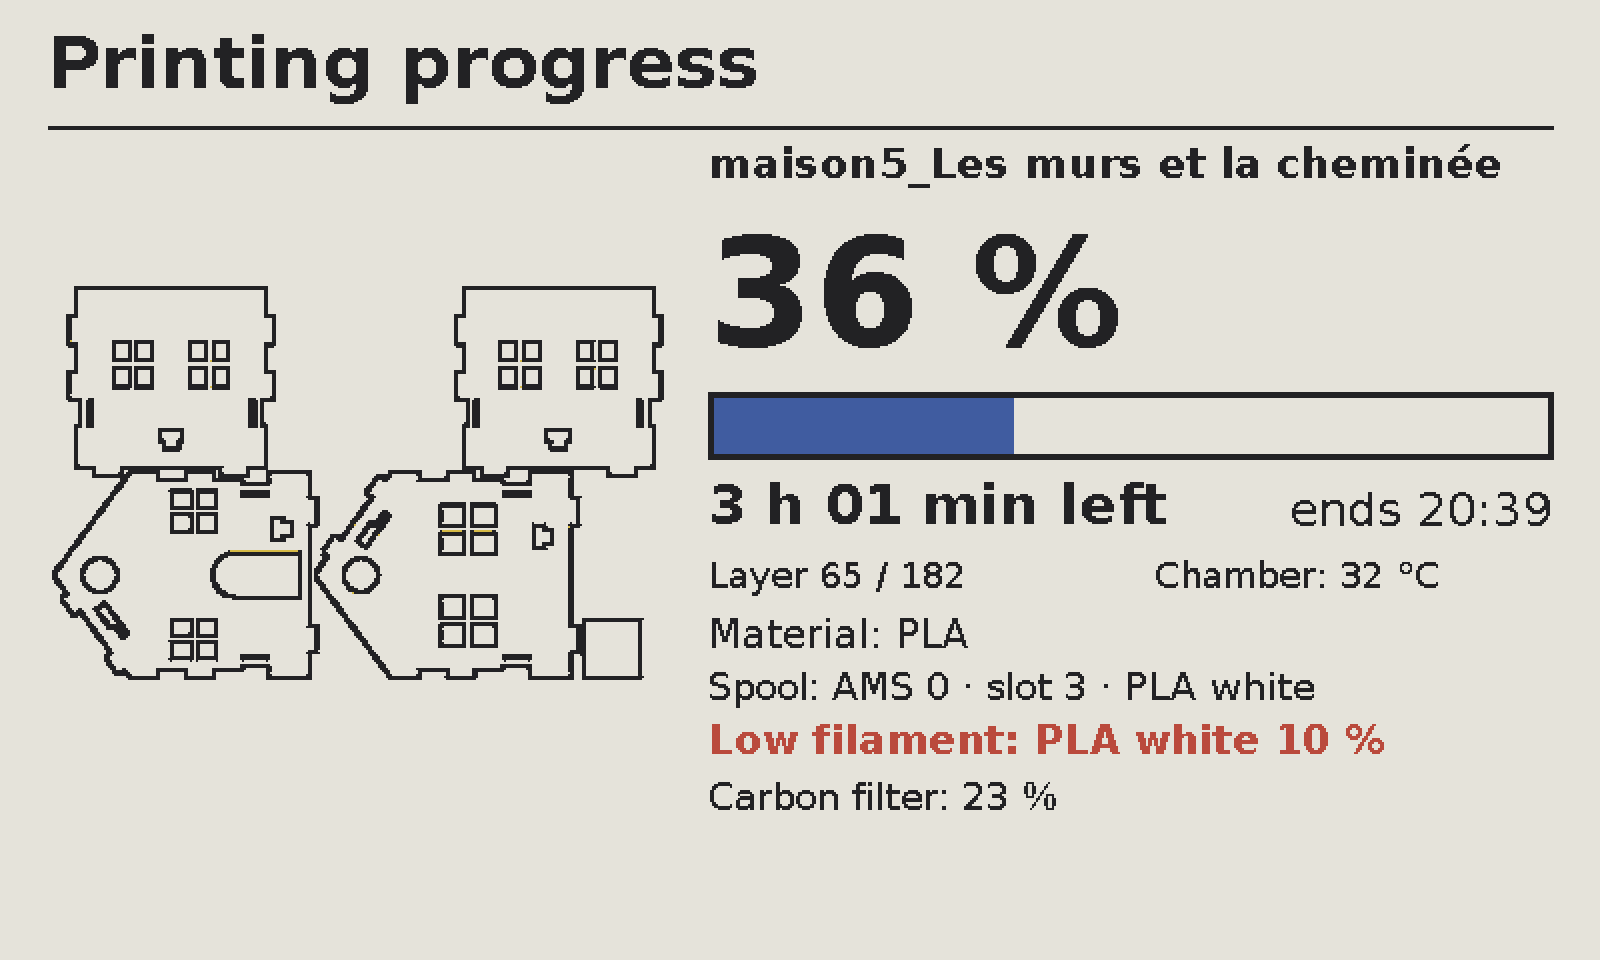
 Example values
01
Printing progress
On the X2D, starting a print opens this view automatically. For another printer or a laser cut, start tracking the job from your phone or by holding a button on the monitor.
When our X2D starts printing, the wall display shows the current layer and time left over Wi-Fi. After the print, it shows when particle and VOC readings are back near their starting levels.
See the $1,000 goal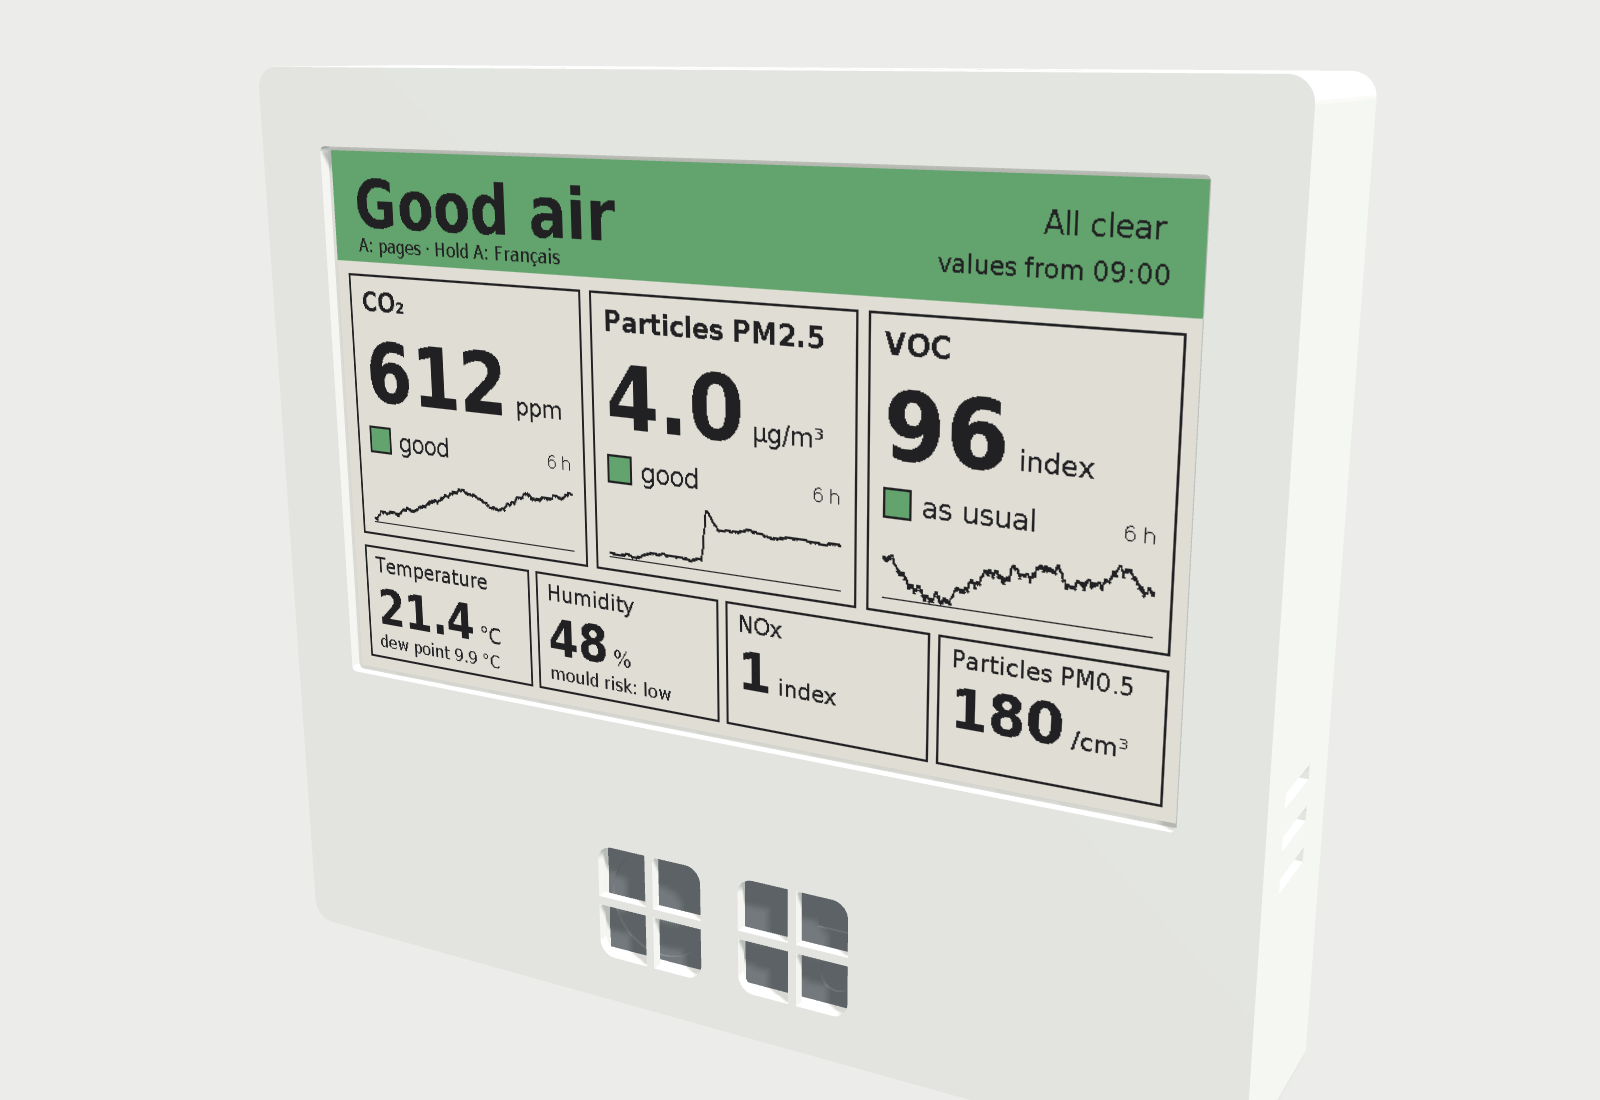
 A job, sped up
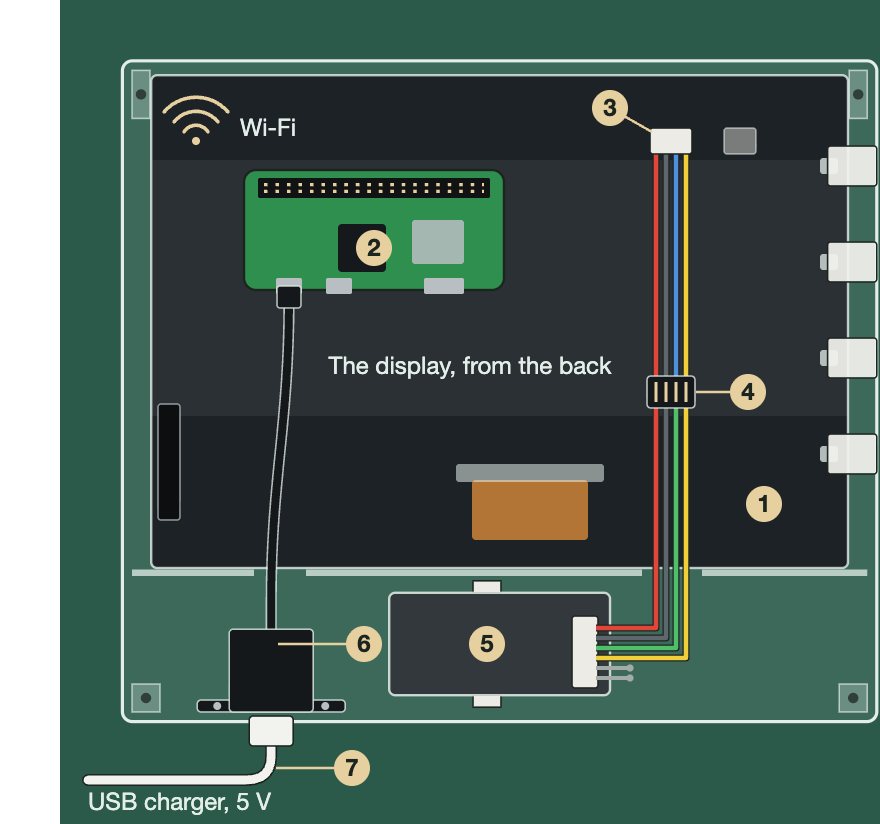
Not one solder joint to make. Three things plug together, and a single sensor does all the measuring.
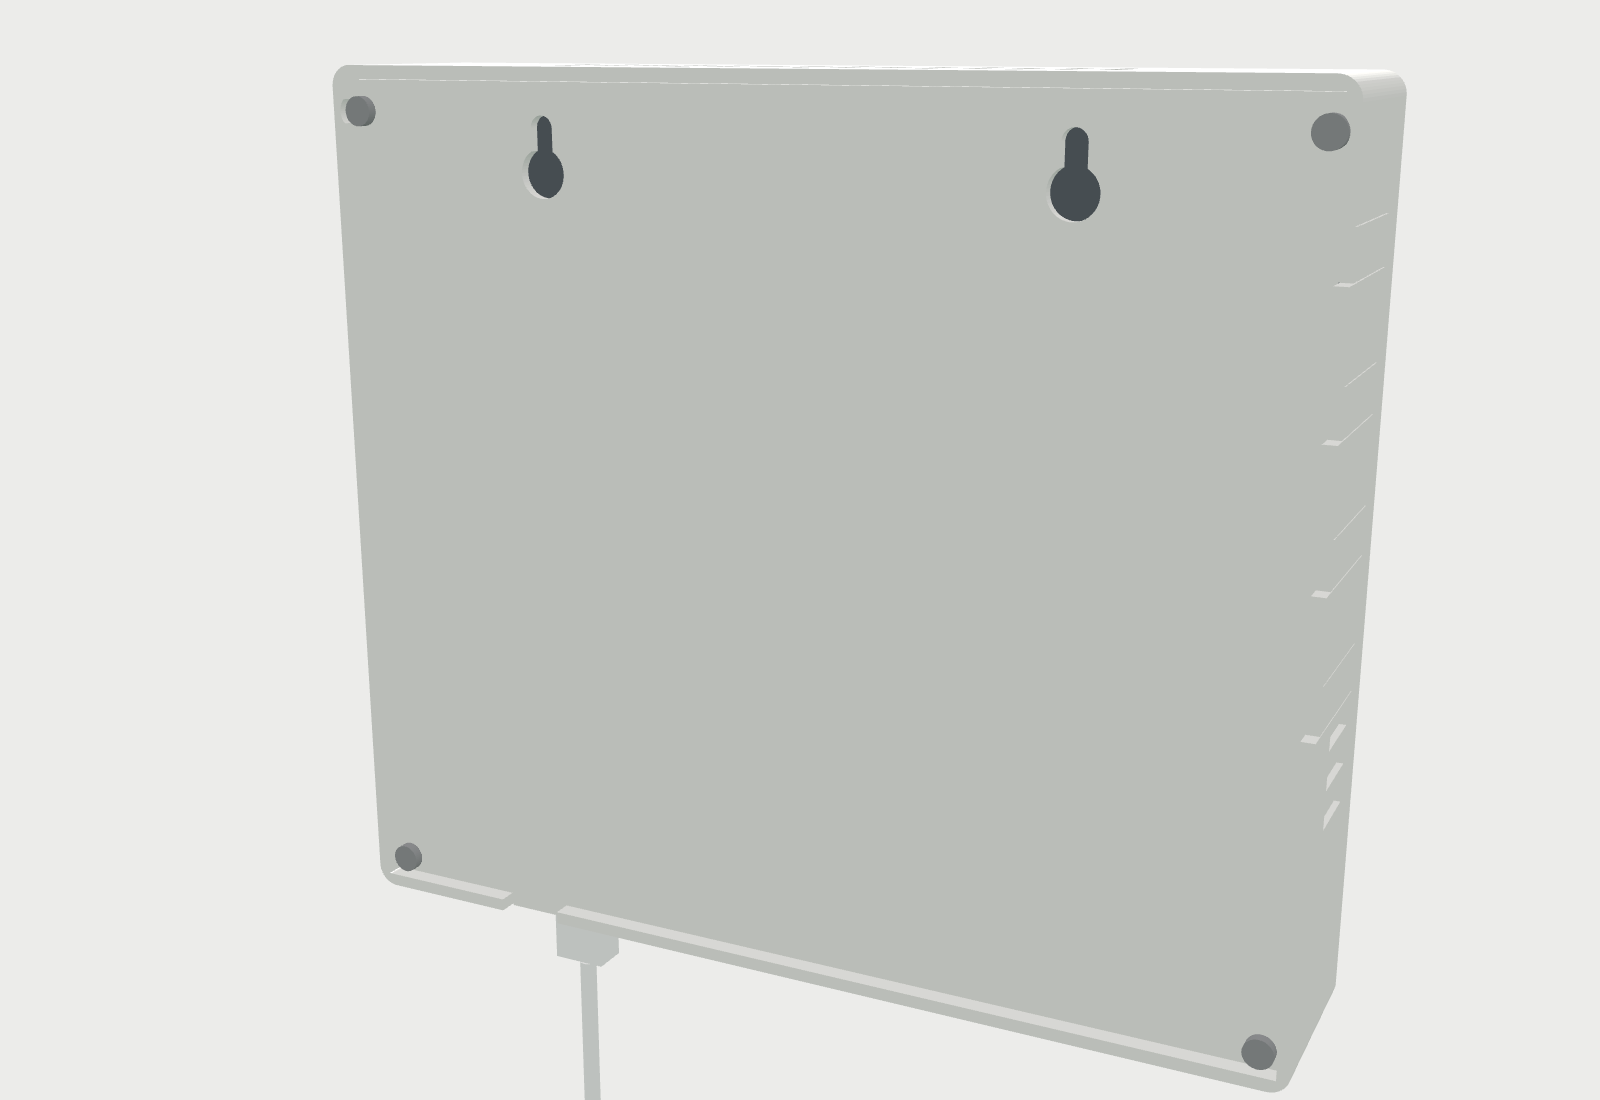
The Pi plugs onto the back of the display. Its pins come already soldered.
The sensor joins the display’s port by a Qwiic cable that clicks in.
The charger plugs in from below.
readings from one Sensirion SEN66, and two more it works out: the dew point and the mould risk.
Highest in these 6 hours: 704, good
Orange from 800 ppm, red from 1,500 ppm
Highest in these 6 hours: 7.6, good
Orange above 15 µg/m³, red above 25 µg/m³
Highest in these 6 hours: 197, fair
Orange above 150, red above 250
Highest in these 6 hours: 1, good
Orange above 20, red above 150
From the 24-hour average humidity (47 %): orange above 60 %, red above 70 %
Followed during each job: a print often shows here first
Worked out from temperature and humidity
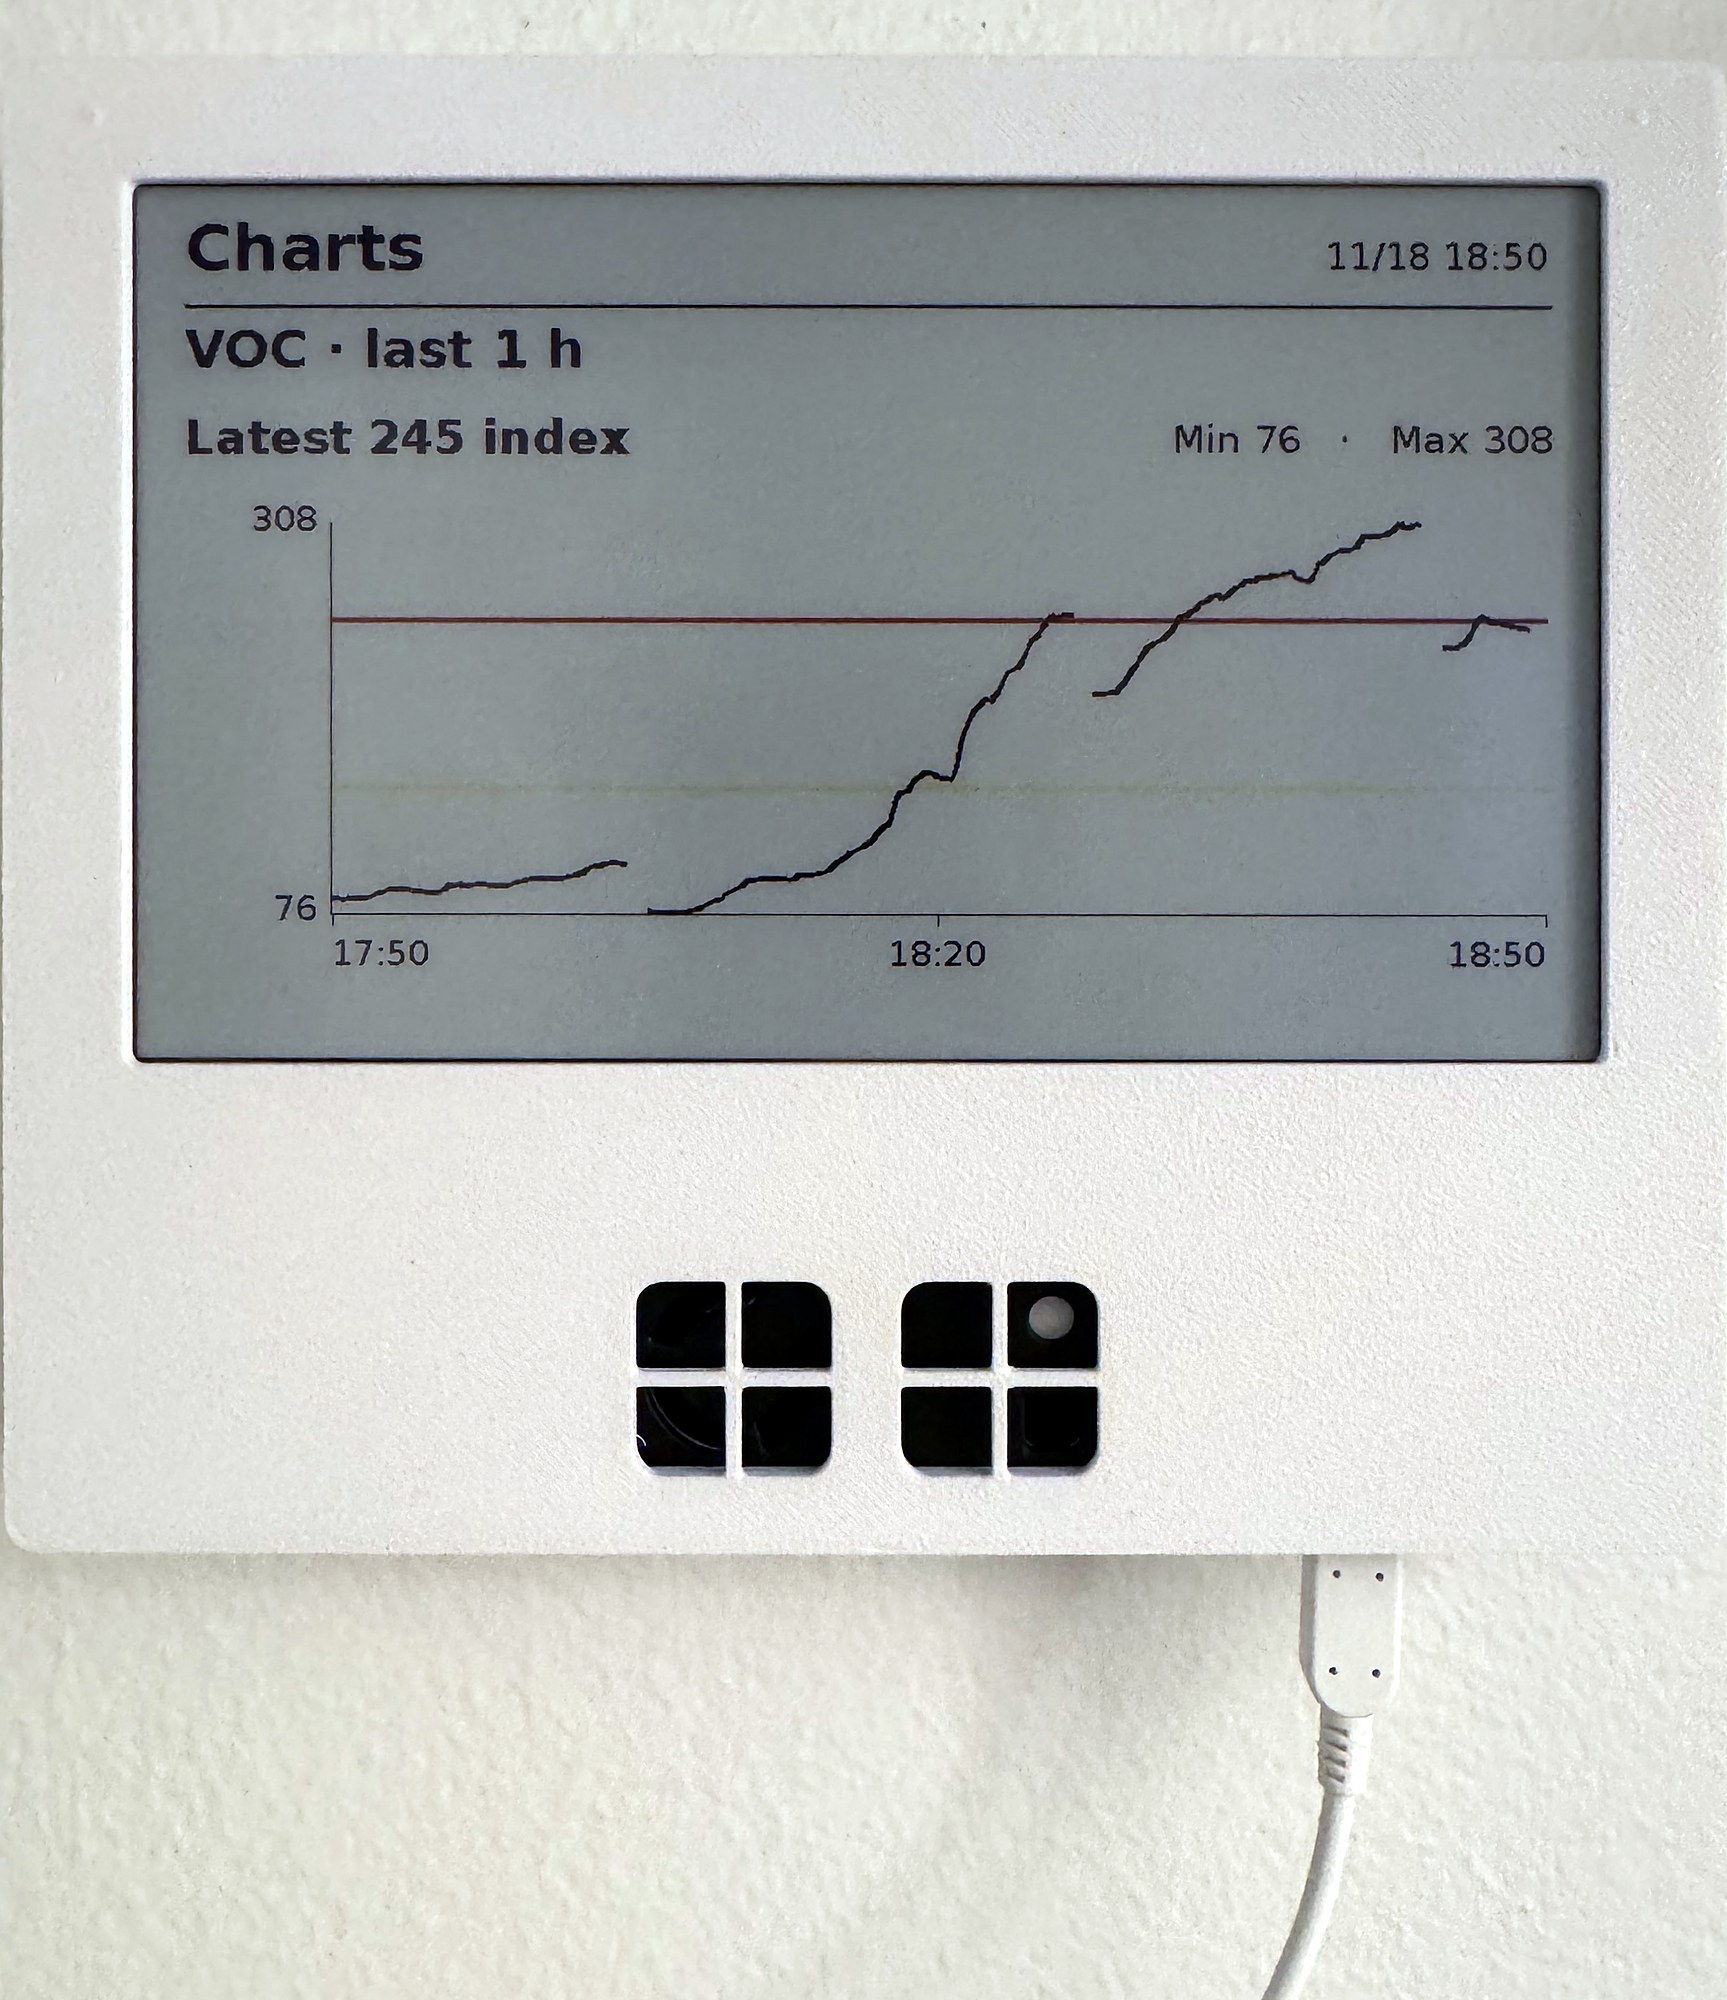
Real readings from the monitor in the workshop, 18 November 2026: the six hours to 15:29, in two-minute averages. The values shown are those of 15:29.
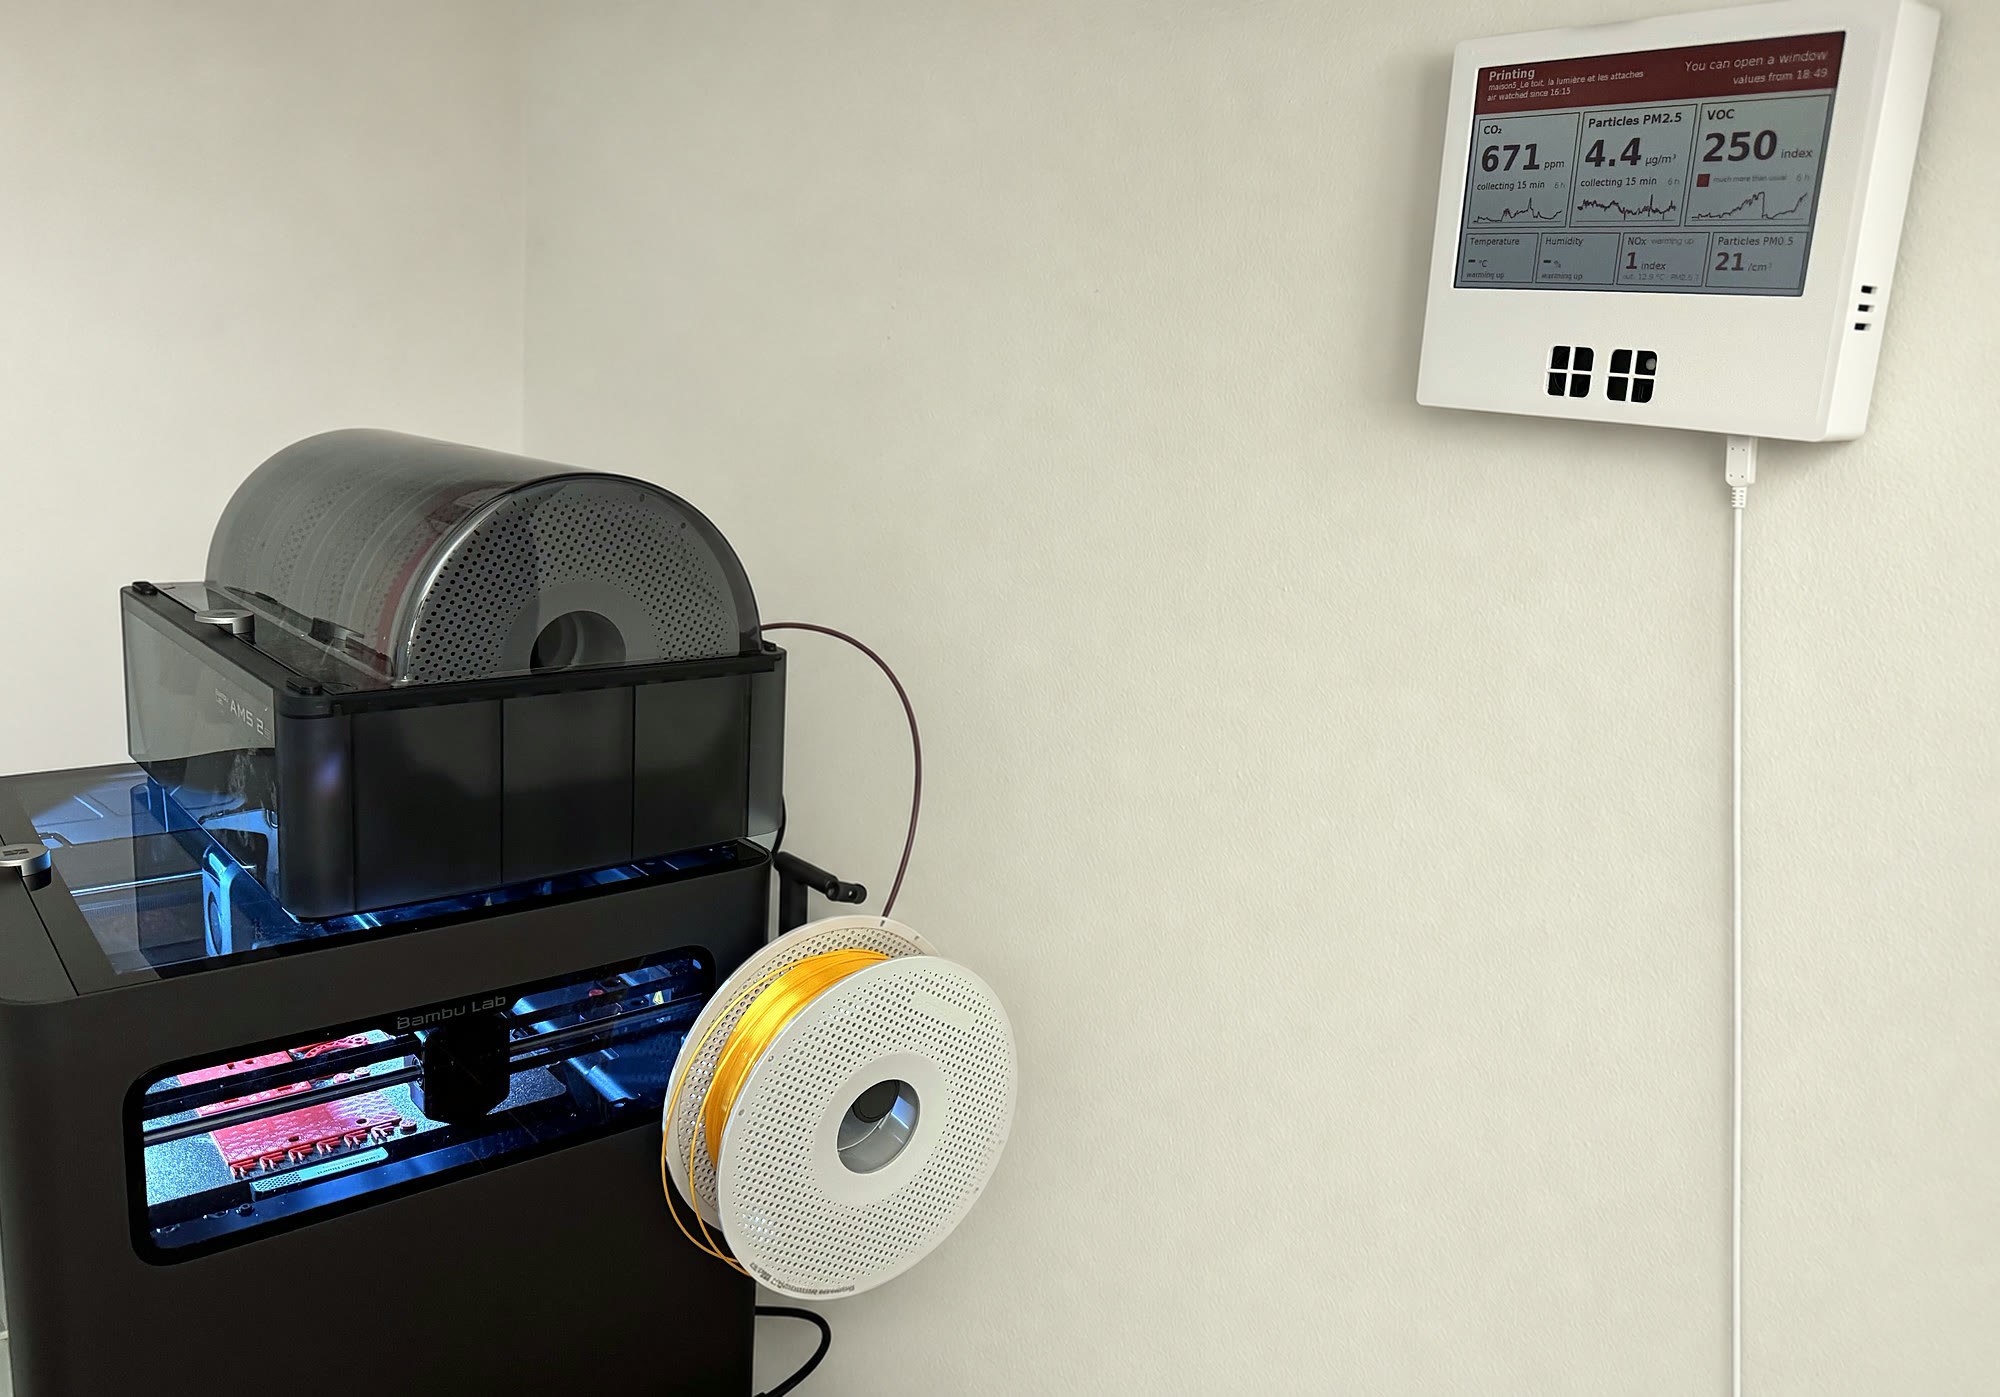
From the start of a job to “you can open”. The second is a real screen from the workshop; the others are drawn by the monitor’s own software with example values, until it shows them for real.
Example valuesOn the X2D, starting a print opens this view automatically. For another printer or a laser cut, start tracking the job from your phone or by holding a button on the monitor.
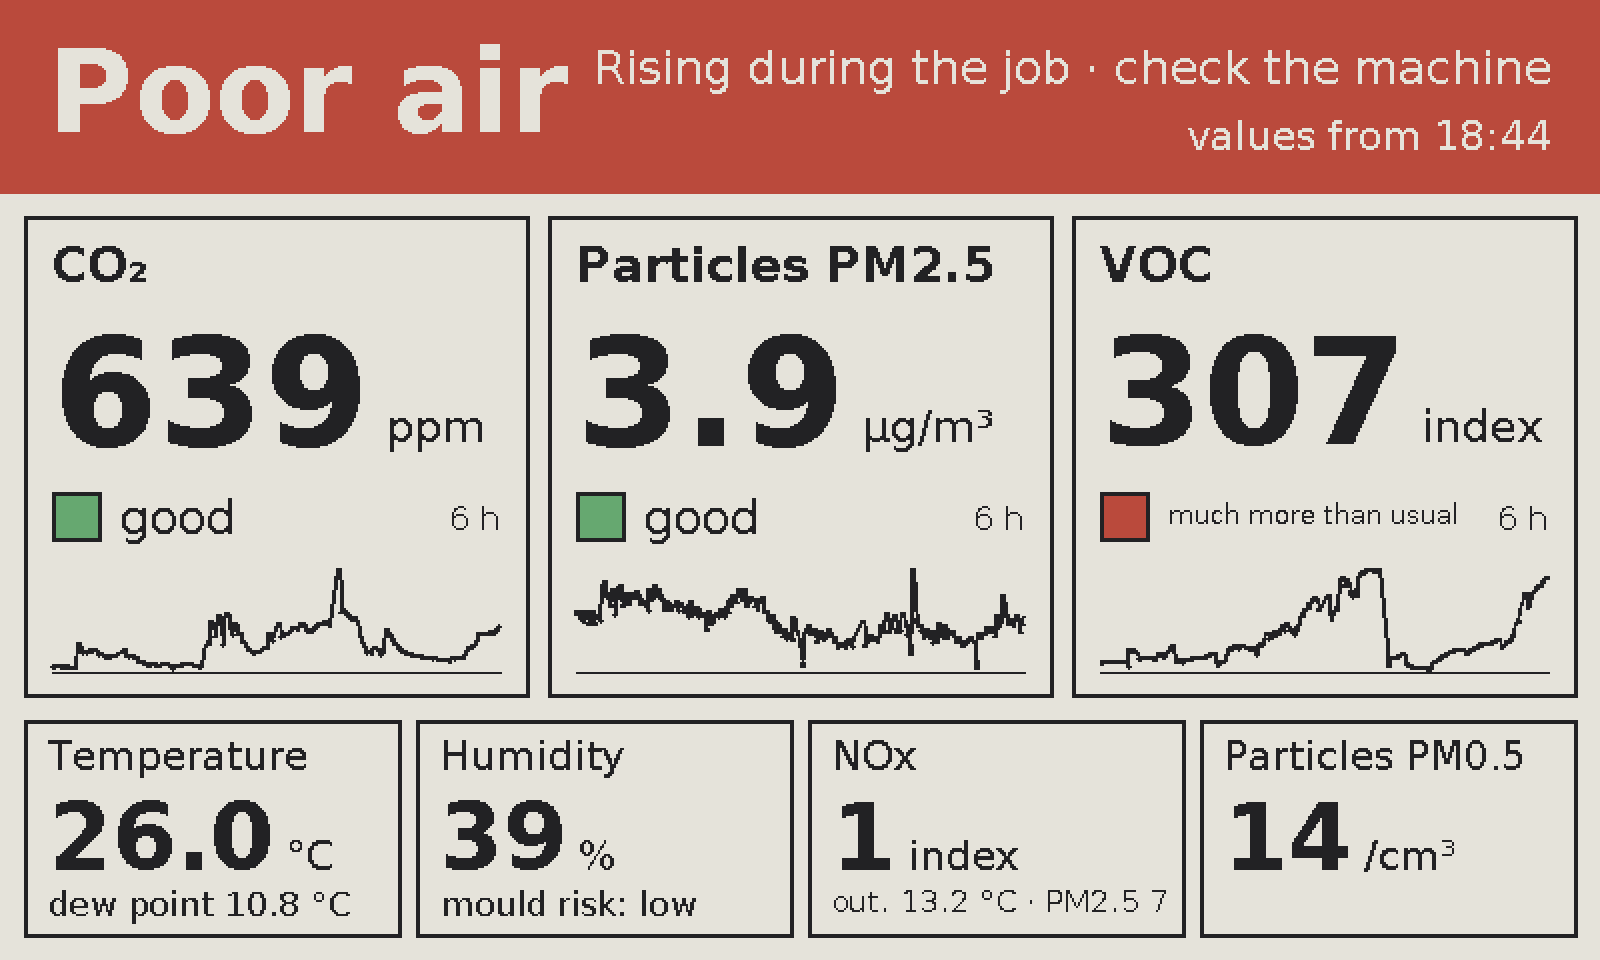 Real screen
If the air rises during the job, the screen turns red. Here, during a real print, the VOC reached 307.
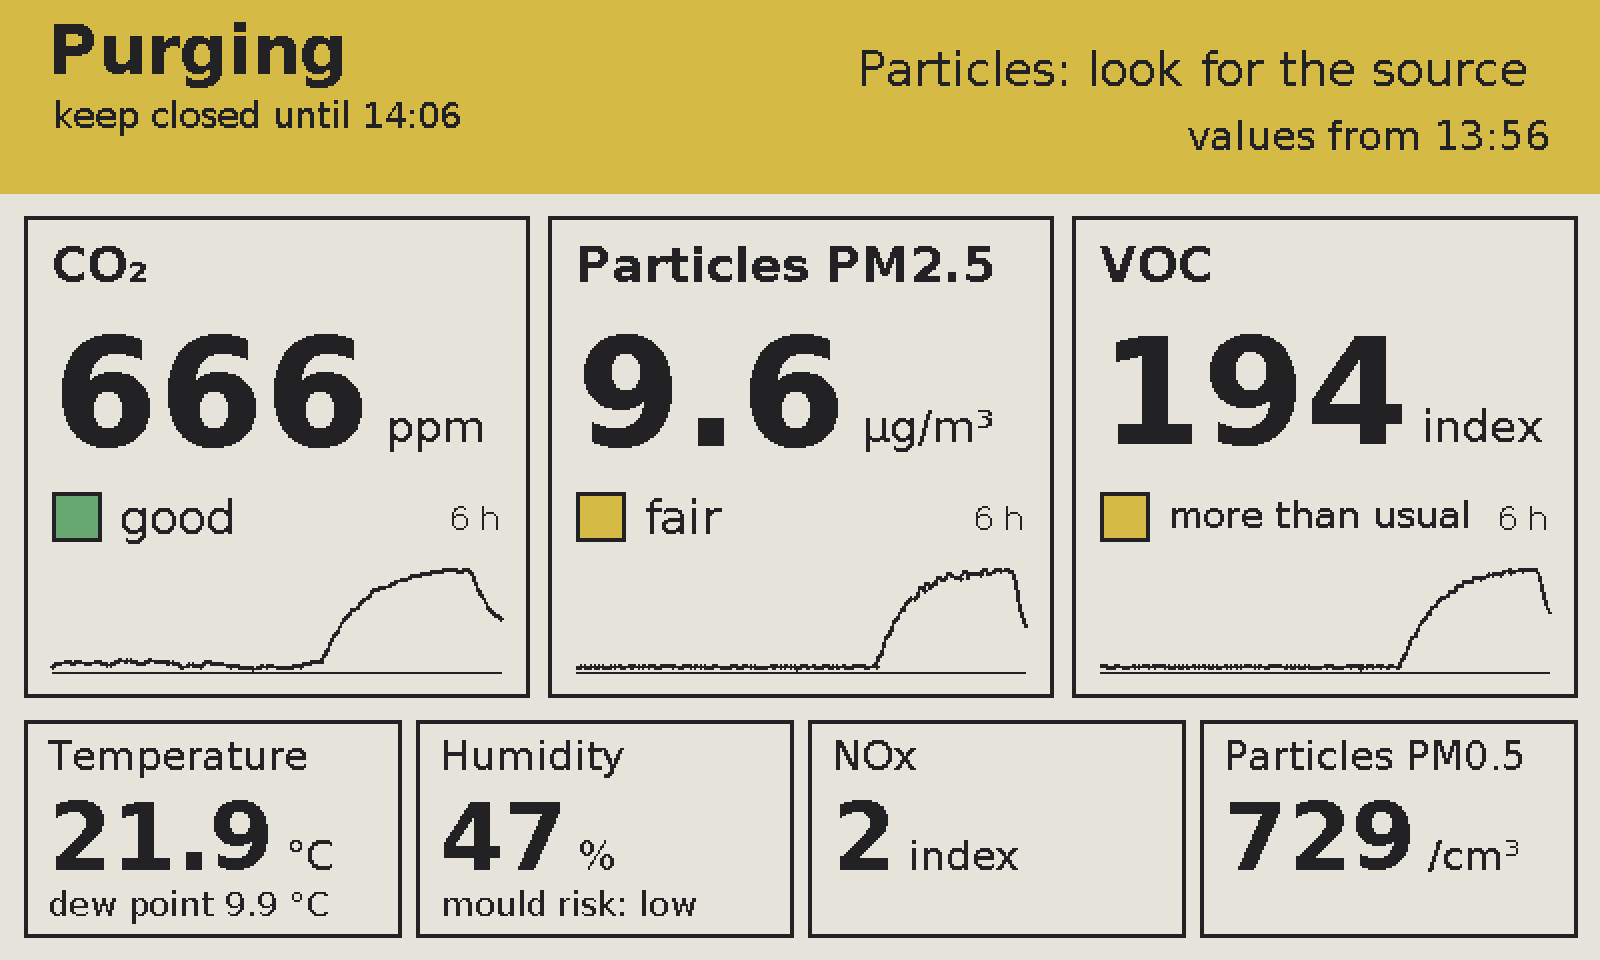 Example values
When it ends, the screen gives the earliest time to open: a minimum purge time.
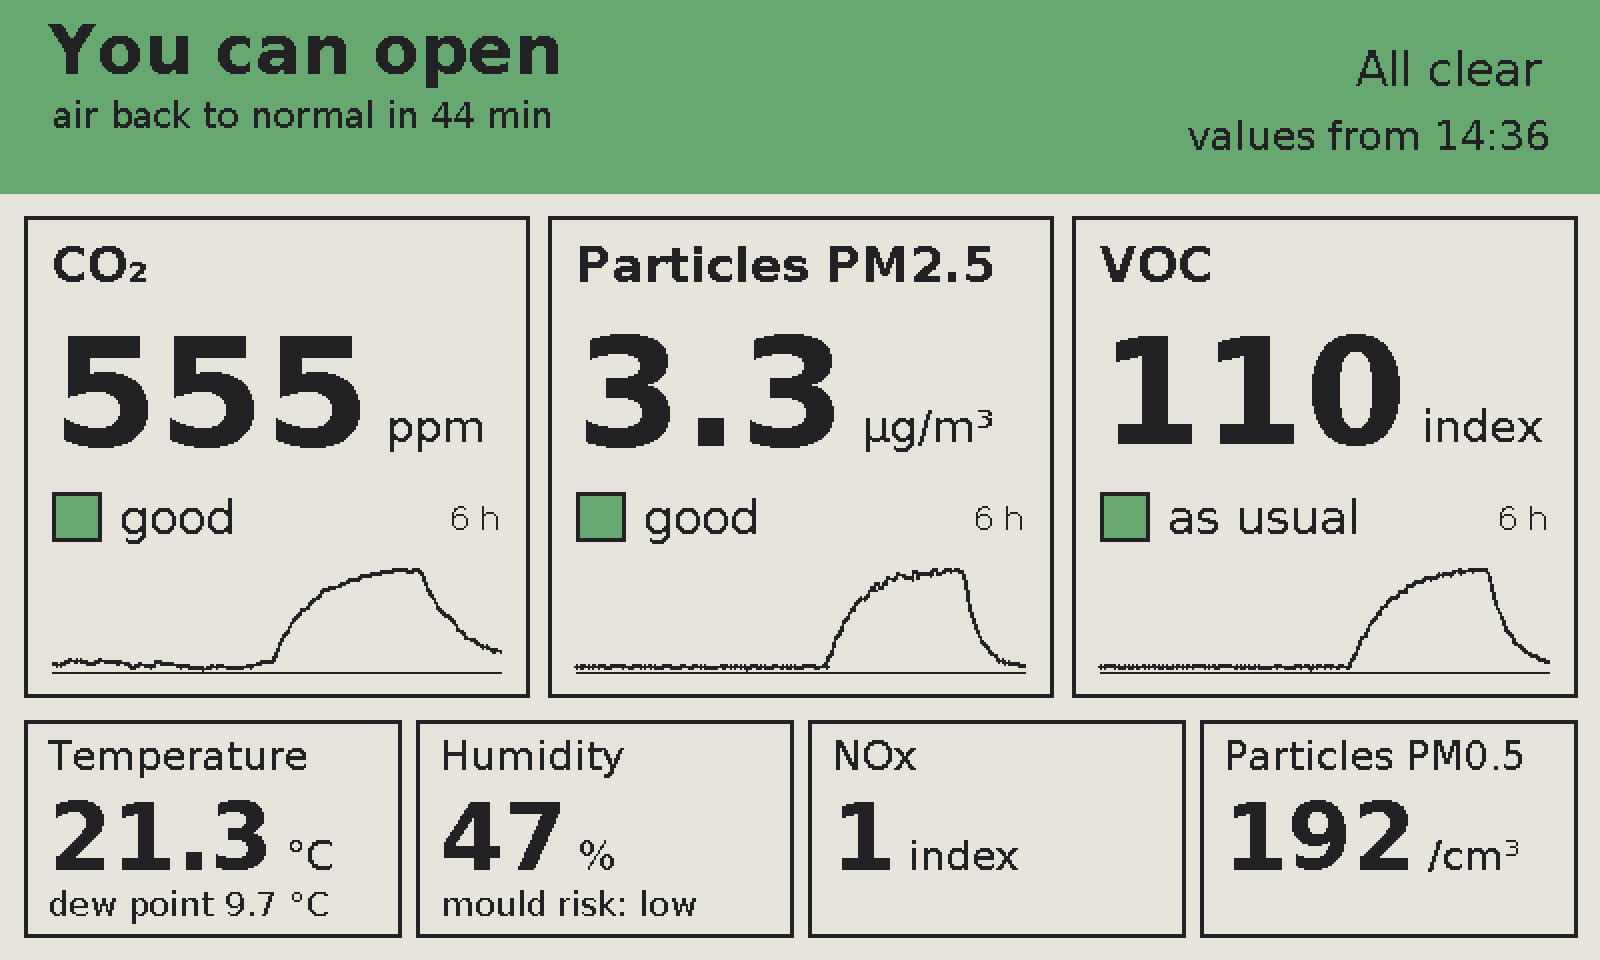 Example values
Then it waits until the particle and VOC readings it follows have fallen back near their level before the job.
Once it runs, no keyboard and no laptop. Press D: the monitor shows its settings page as a QR code, and the page opens on your phone, on your home network only.
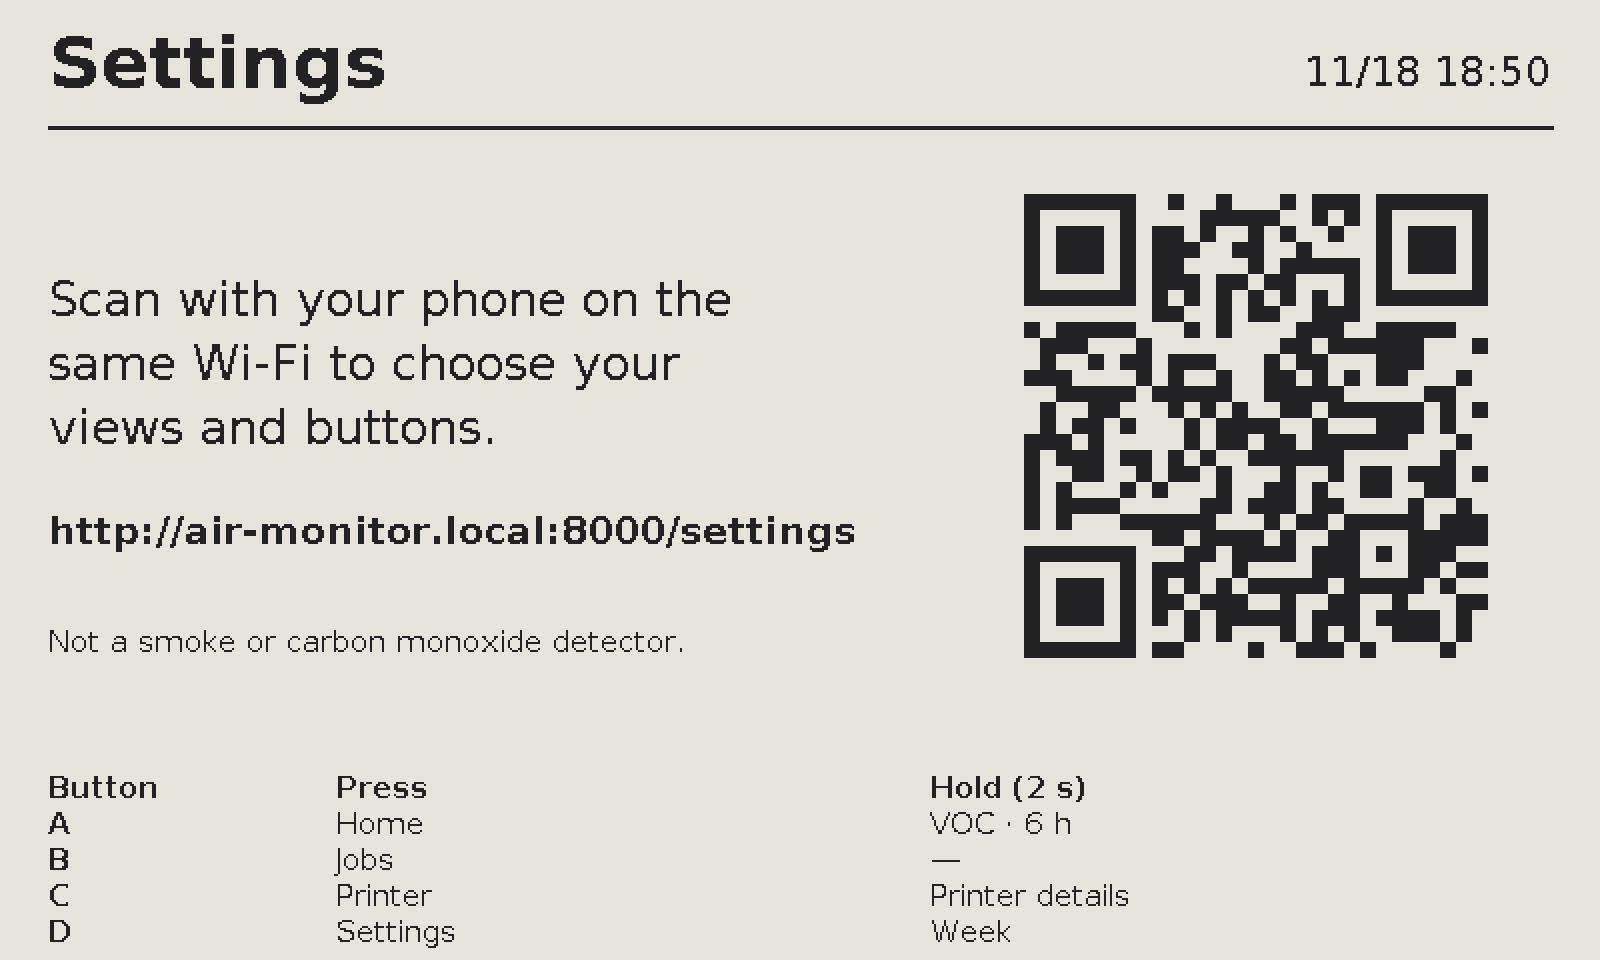
The Settings view shows the page’s address as a big QR code.
The settings page opens in your phone’s browser. Nothing to install, nothing to type.
Your printer, alerts on your phone, the weather outside, night hours, the altitude, and what each button shows.
That is all: the screen restarts by itself with the new settings.
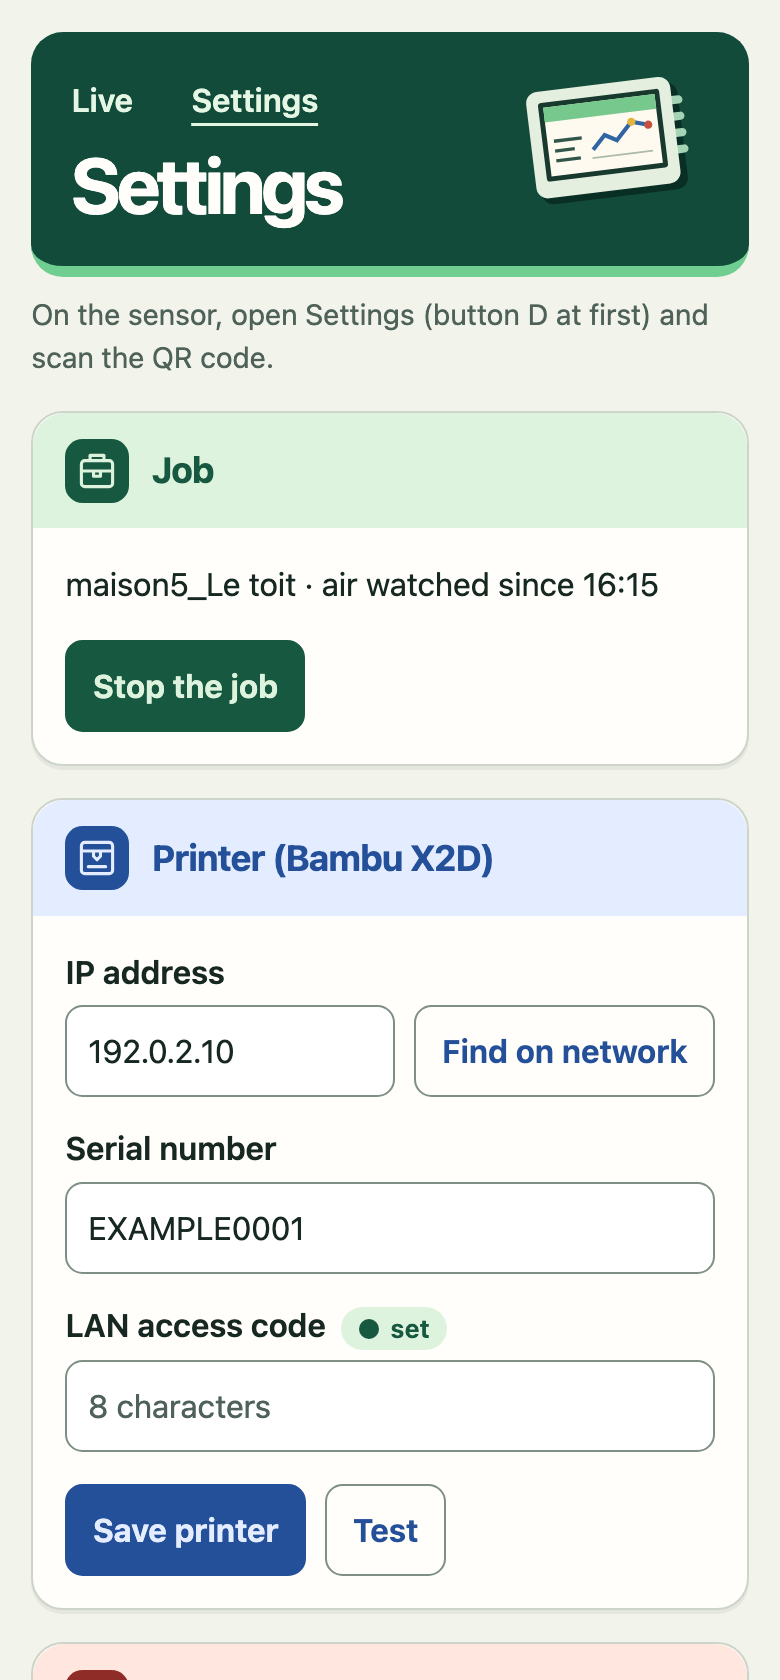
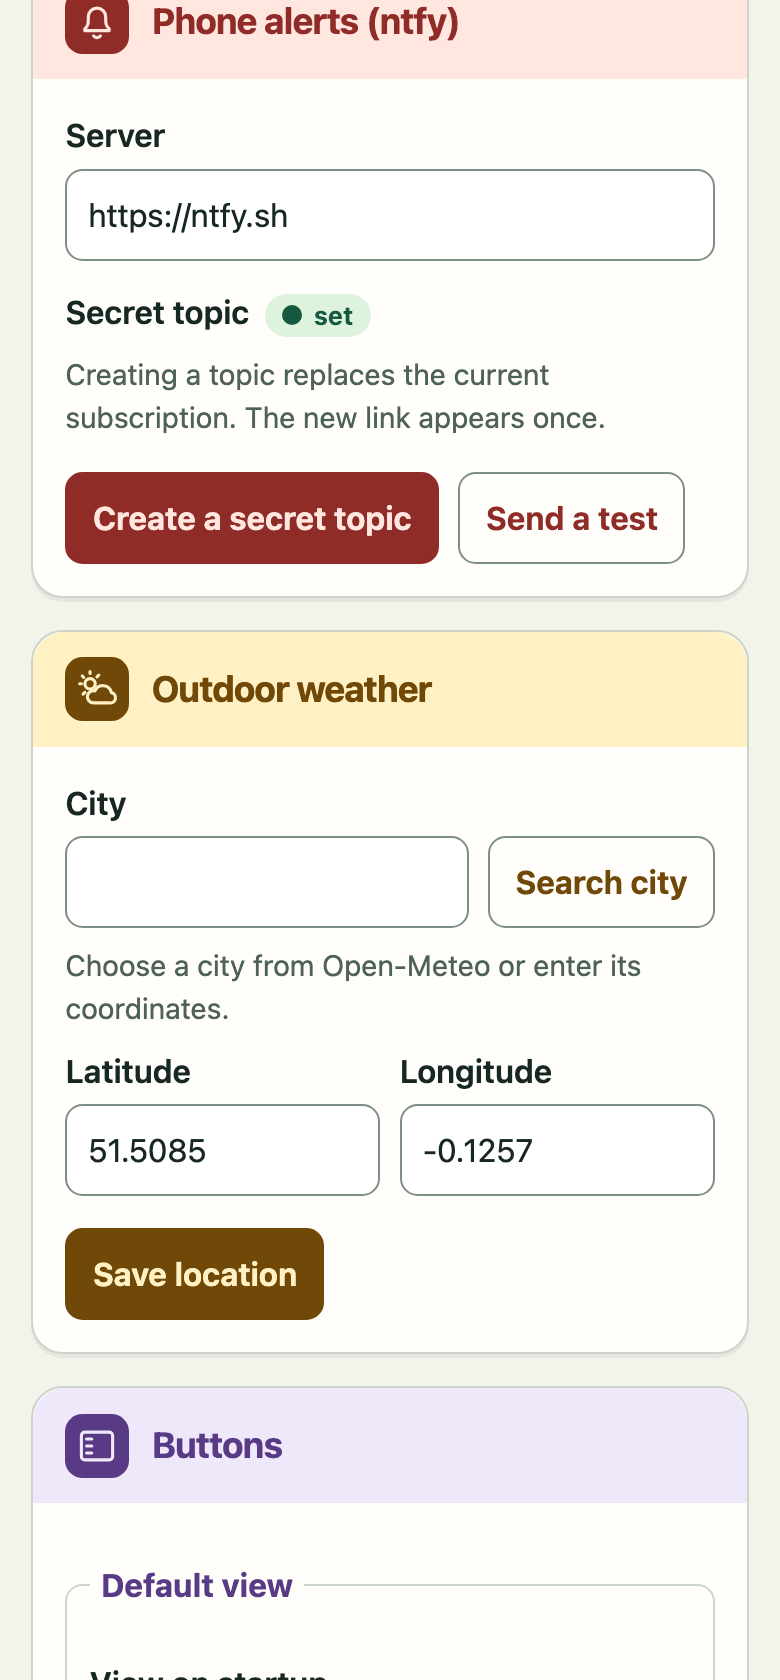
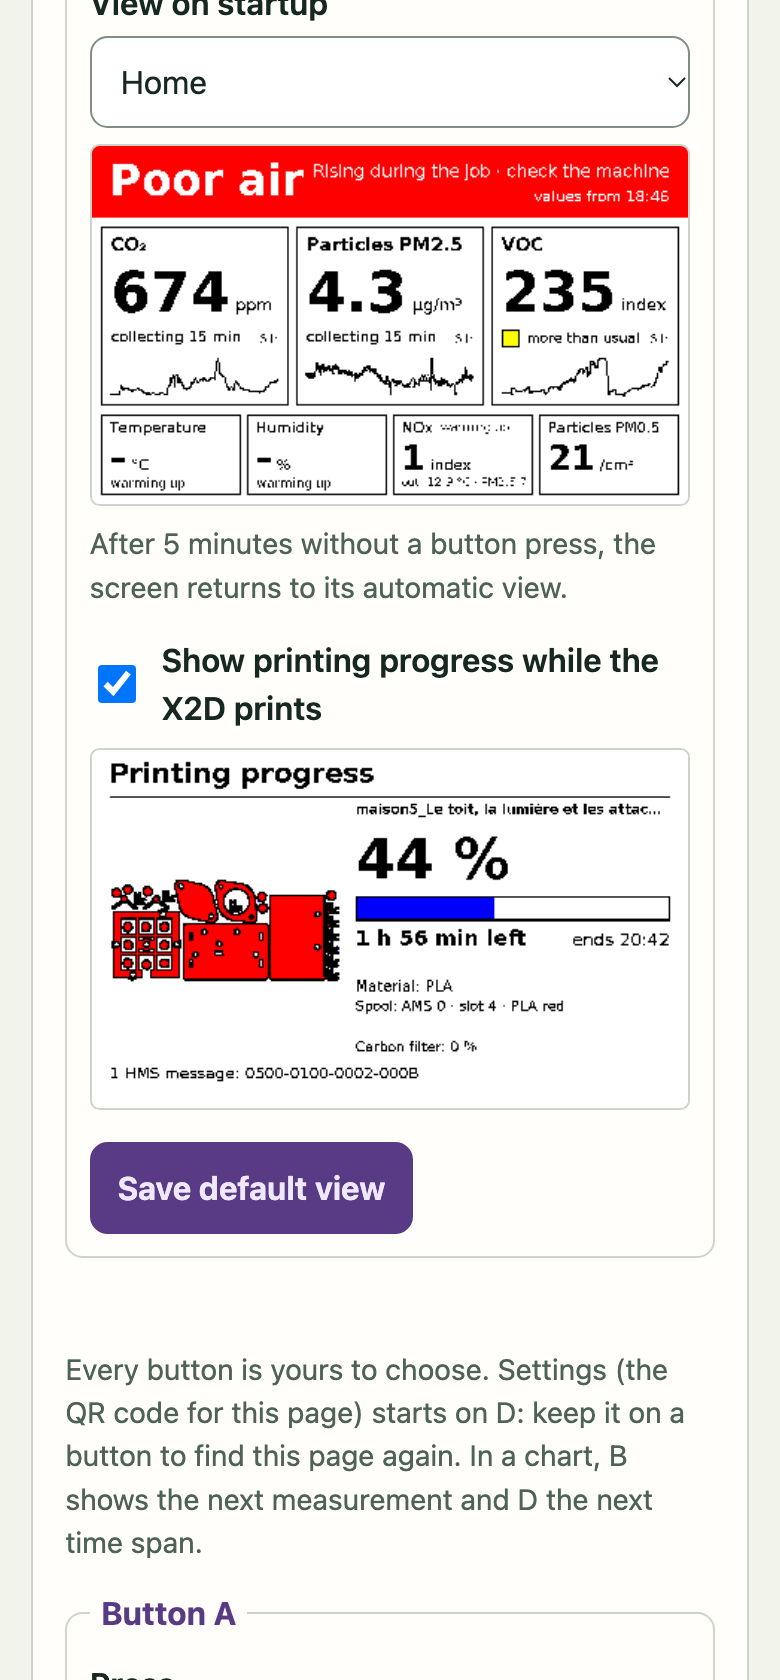
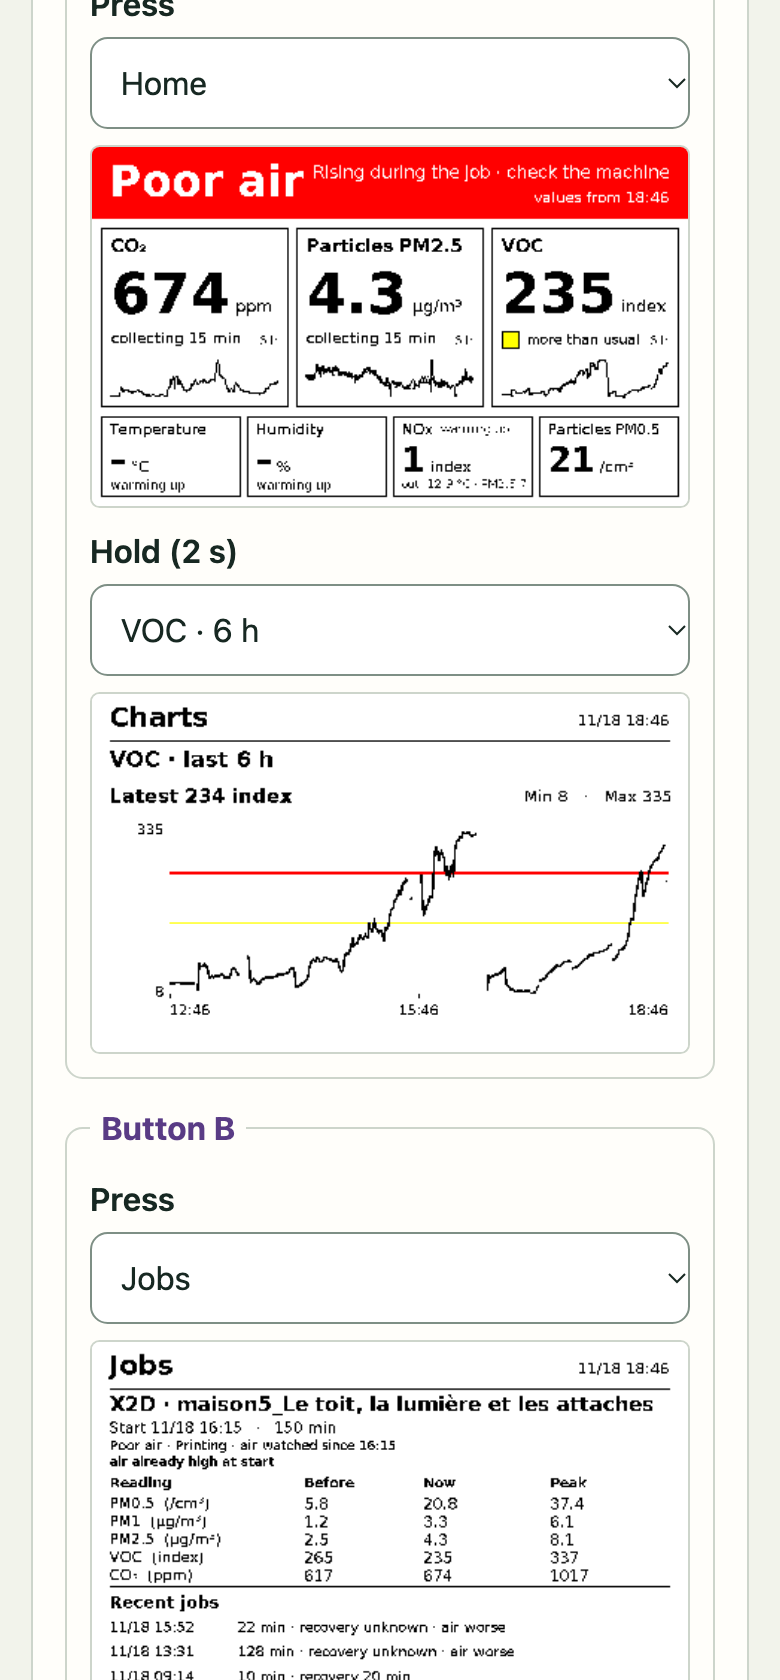
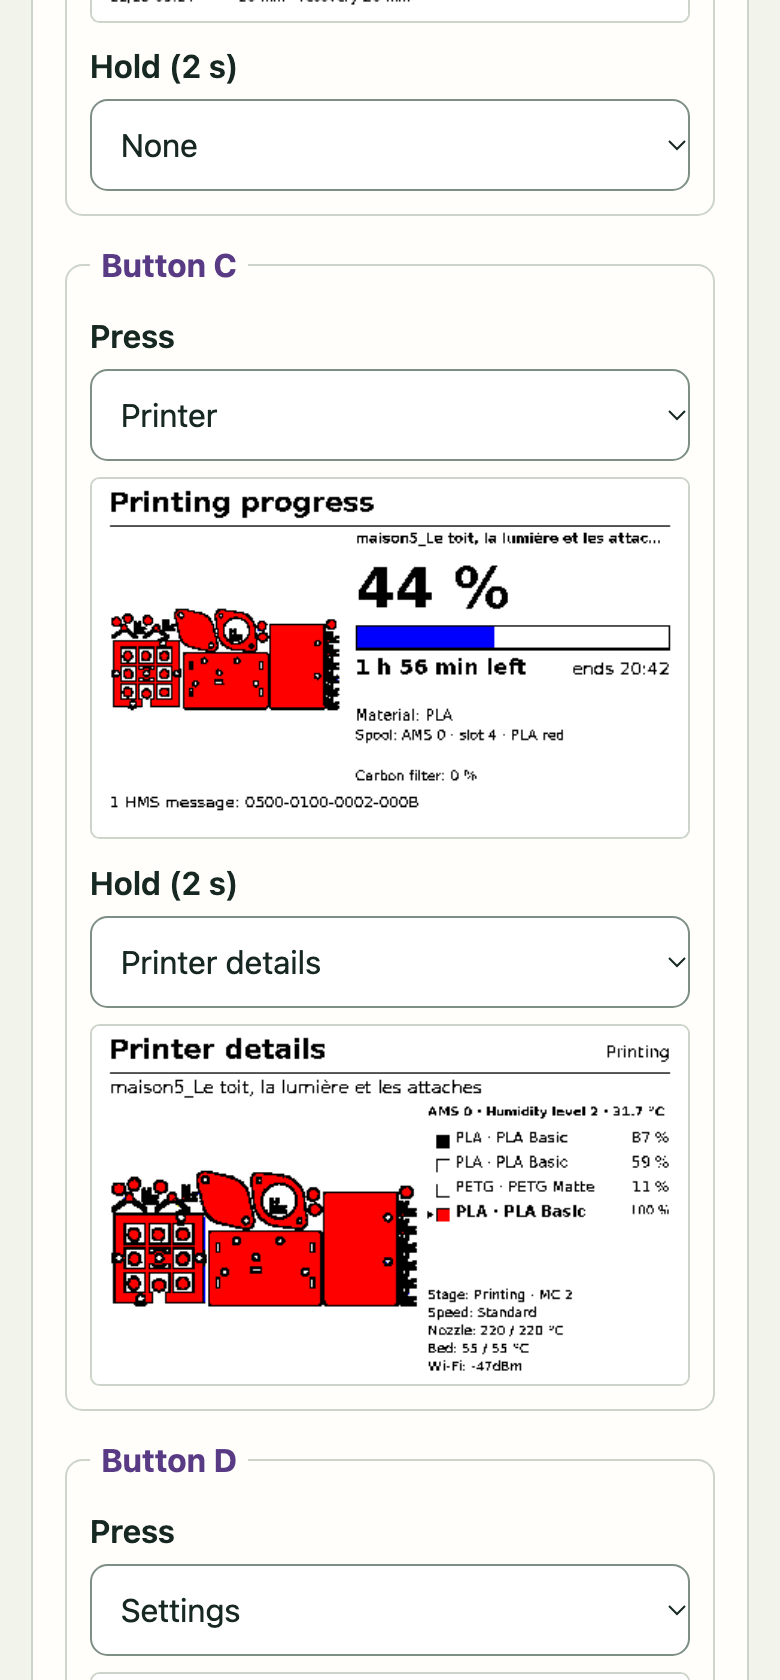
Scroll inside the phone
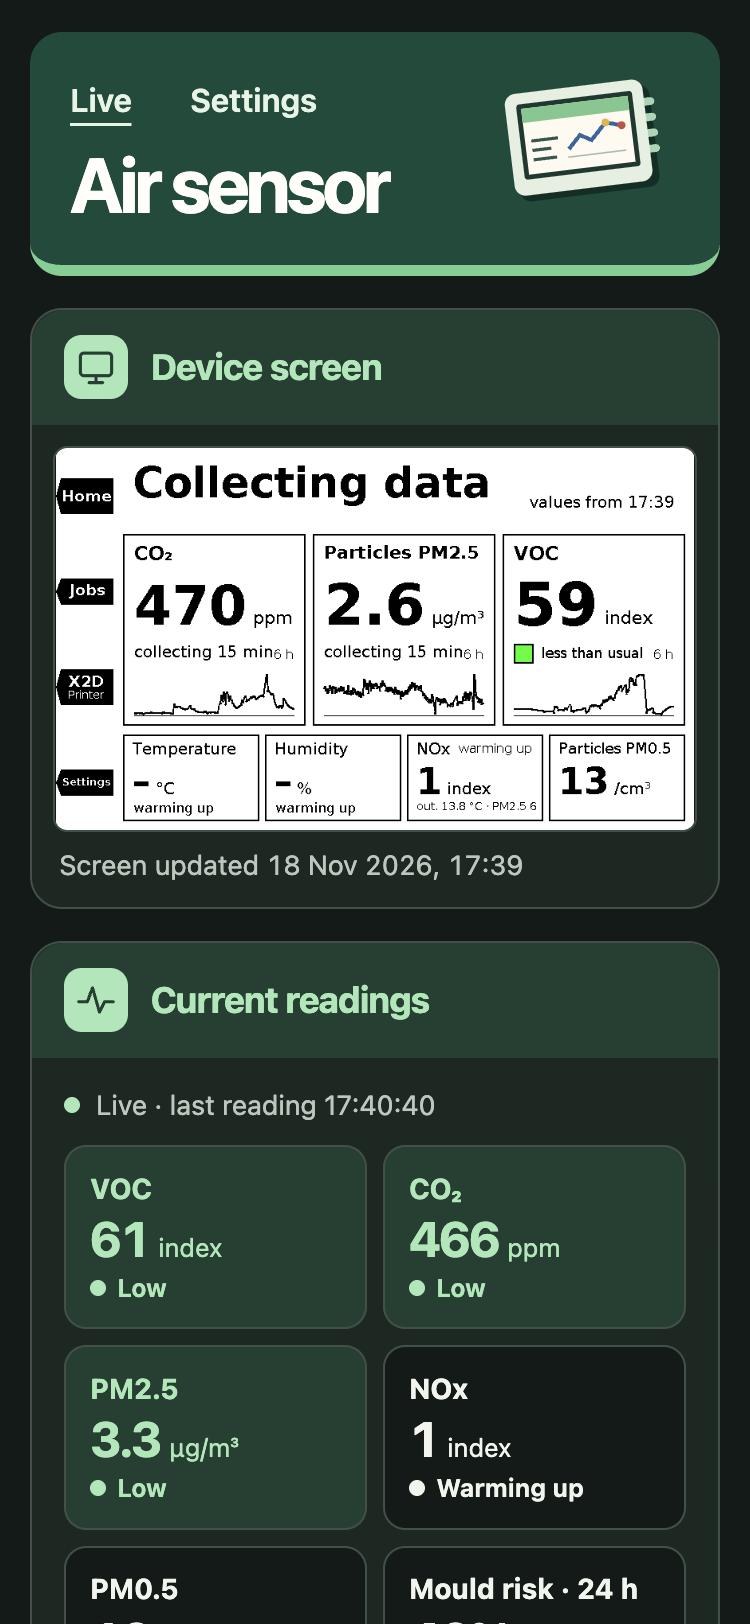
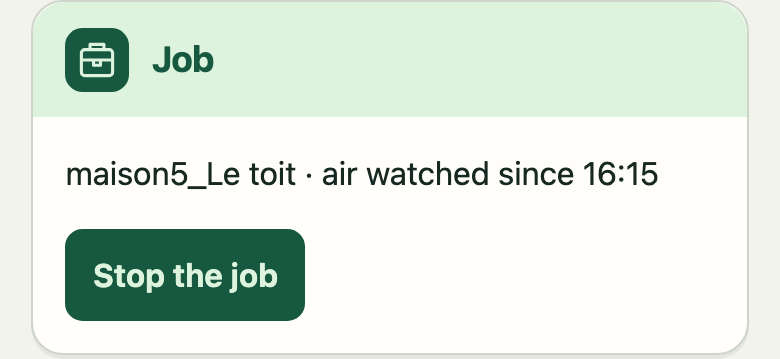
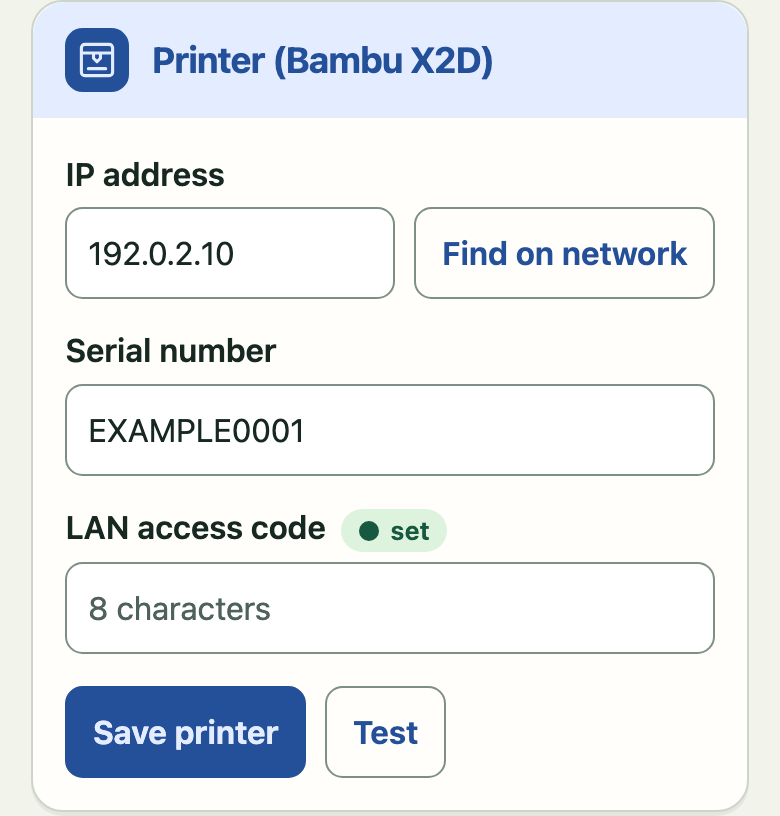
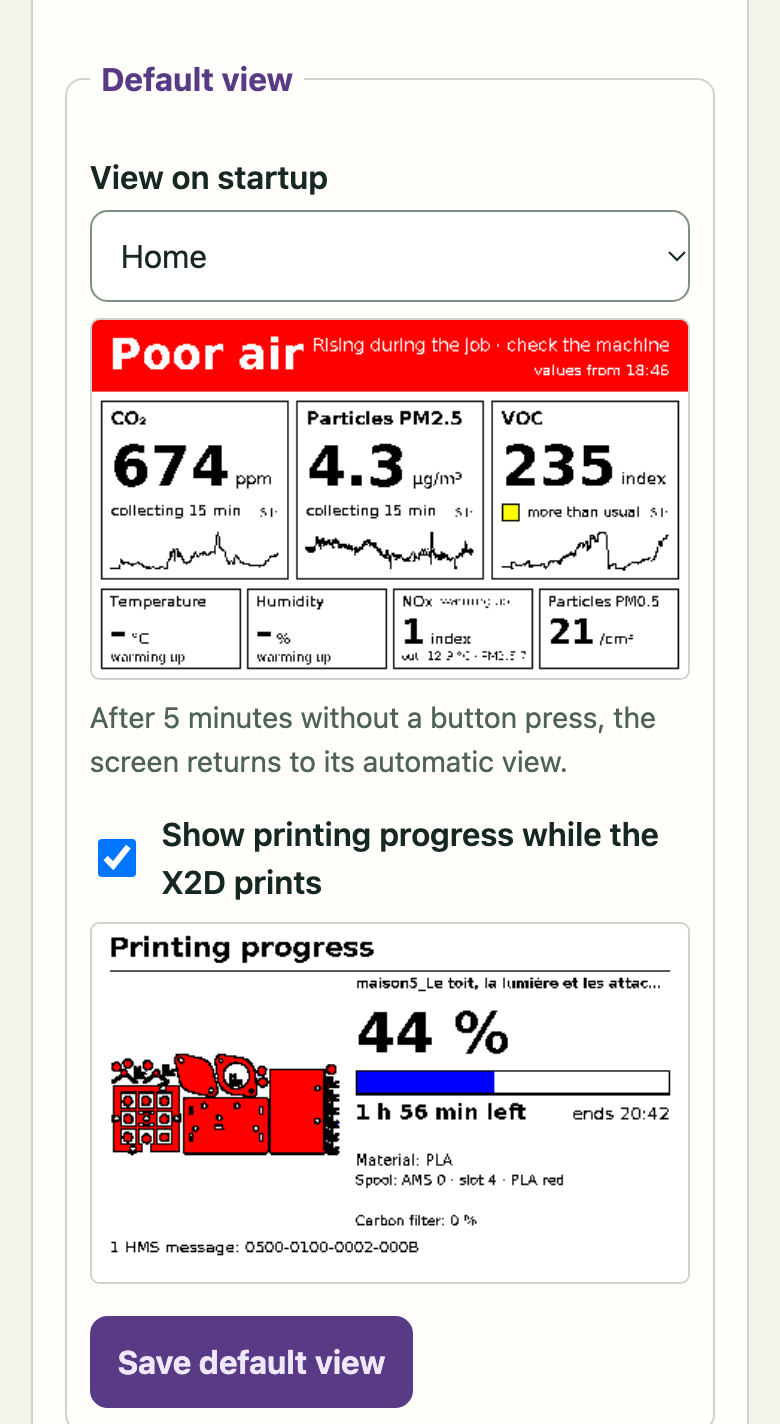
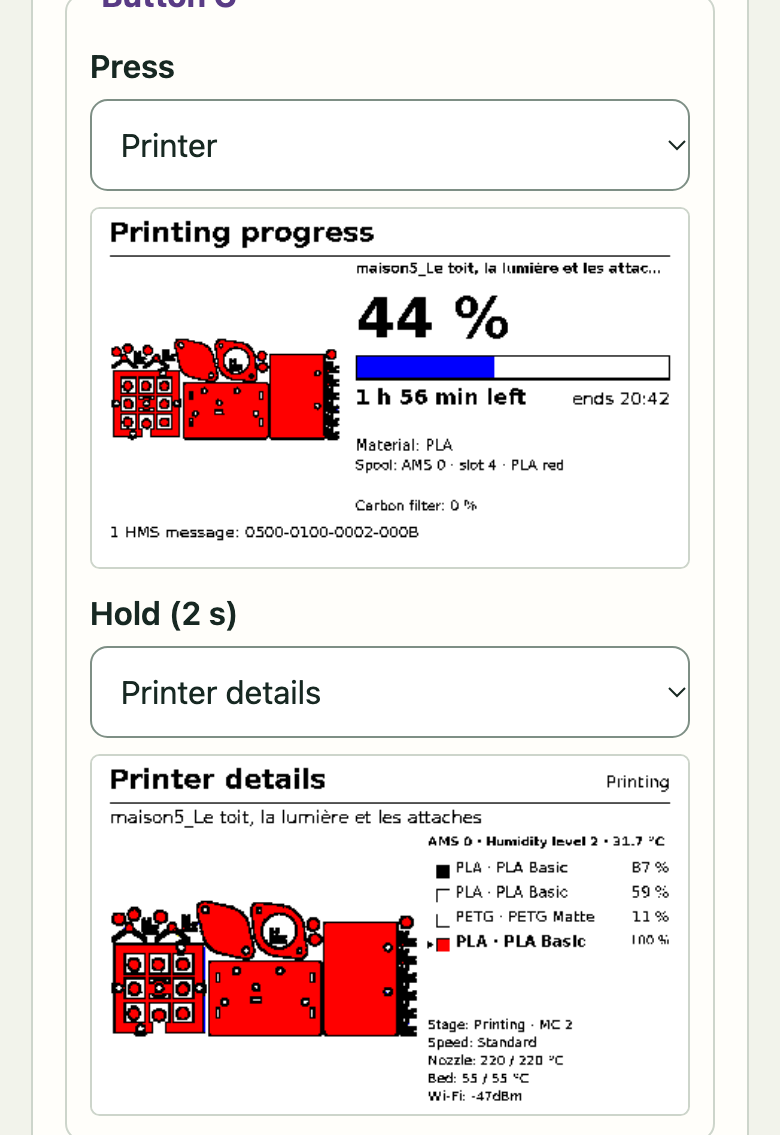
Screenshots of the real settings page, with example values. The page answers only the devices on your home network, and the printer’s access code and the alert topic never come back to the phone.
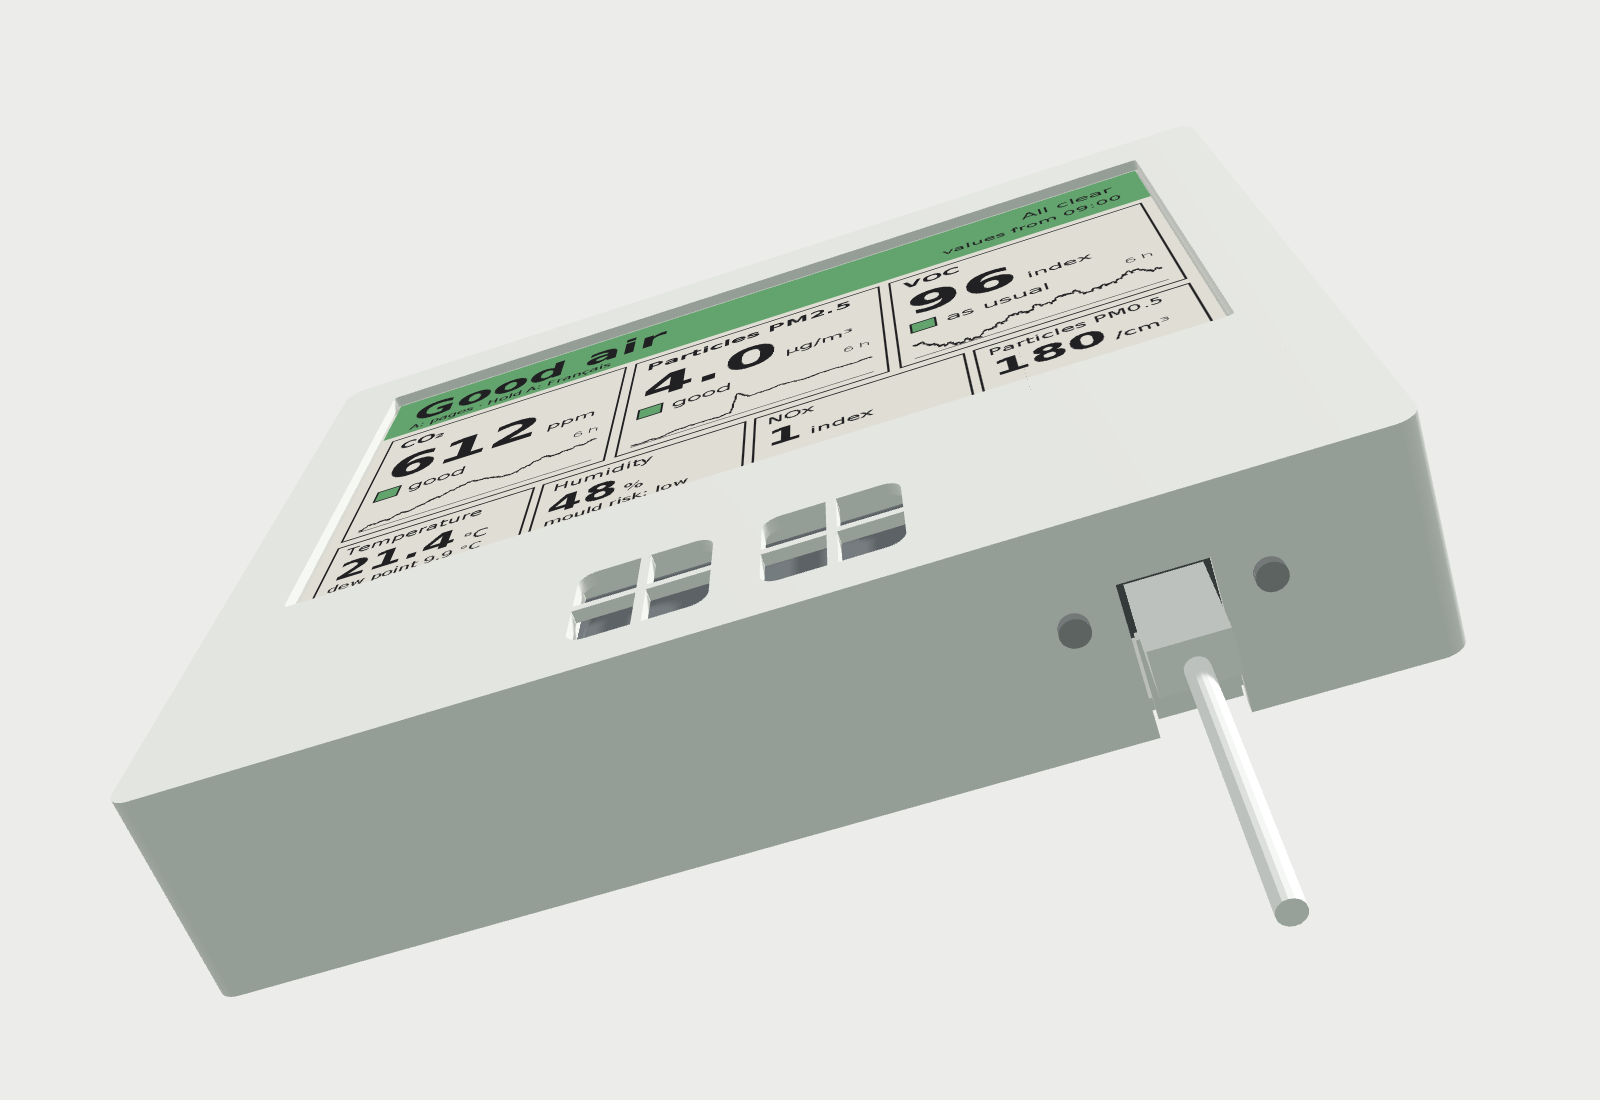
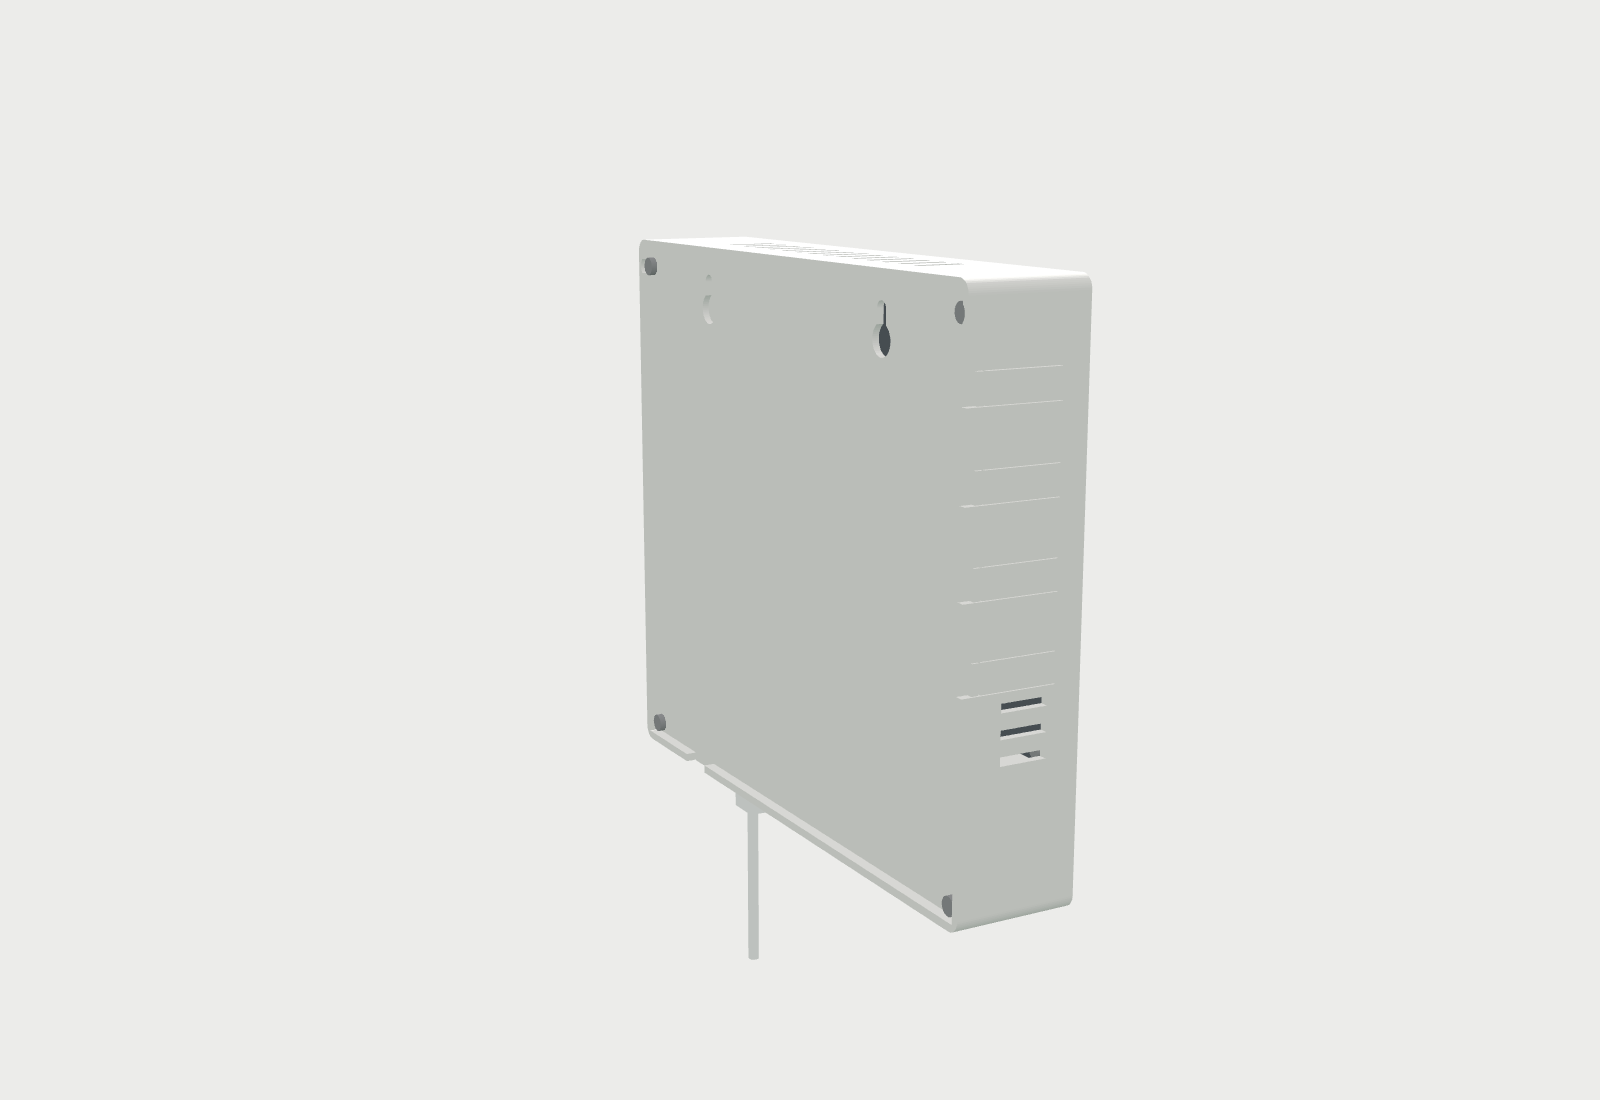
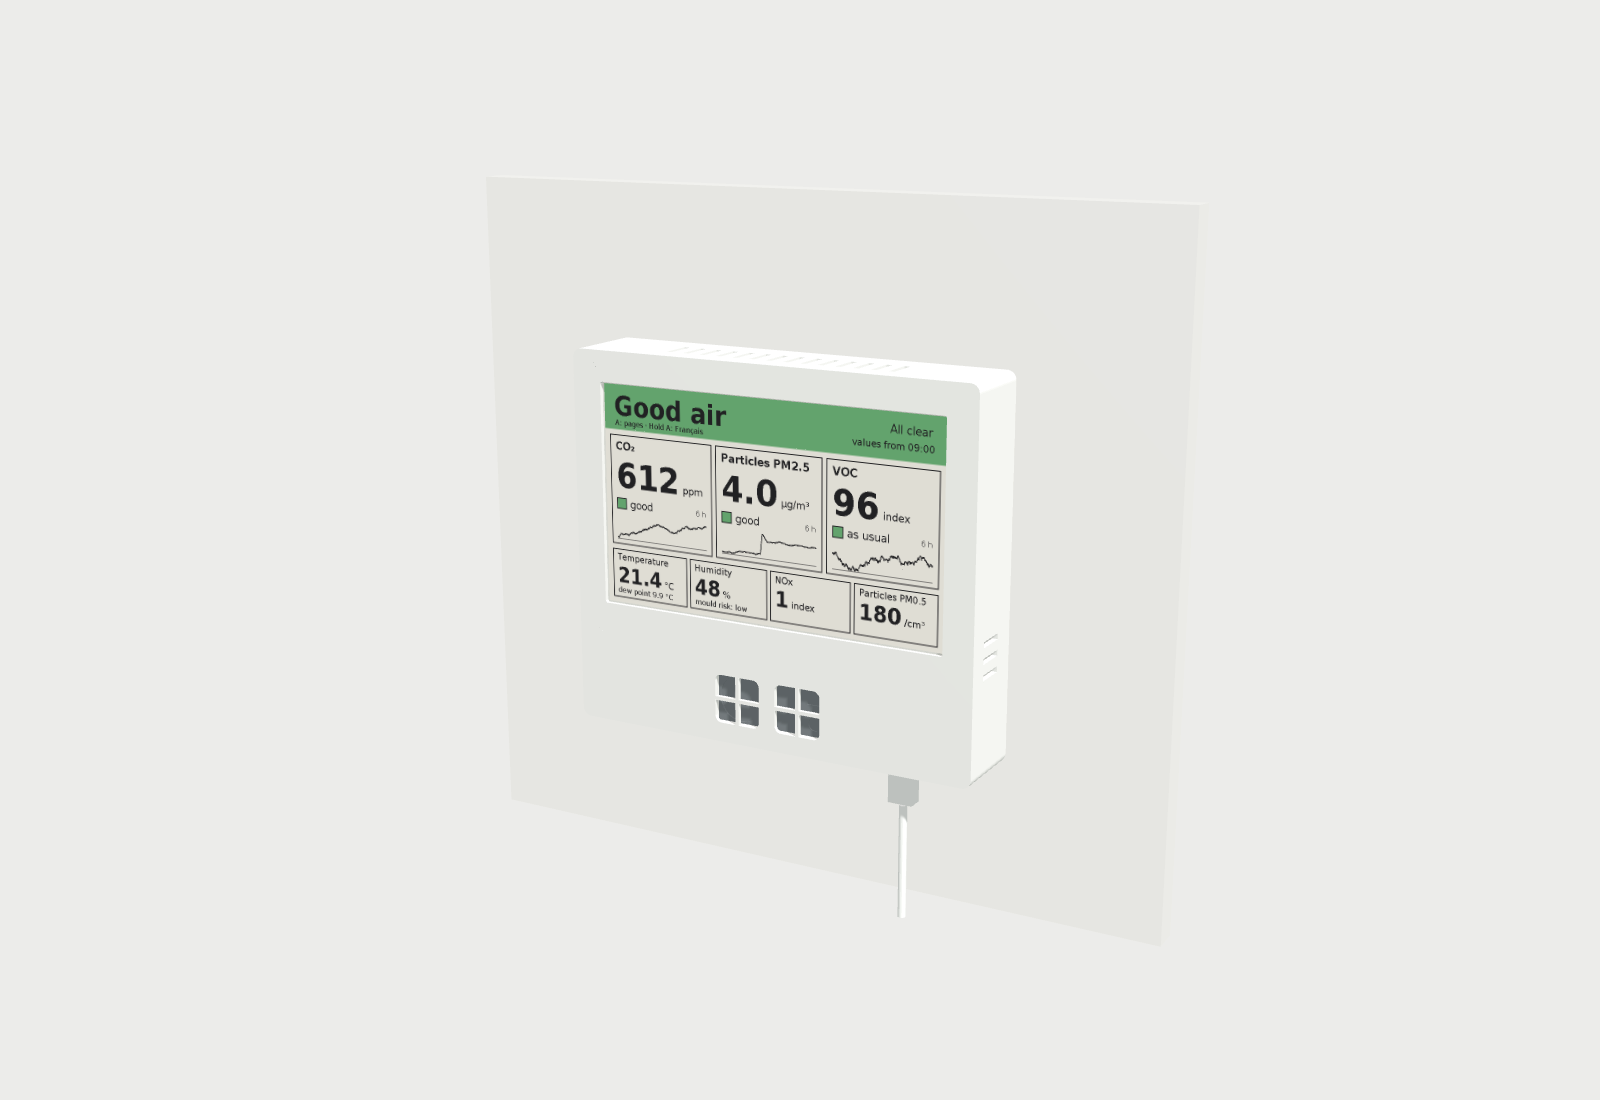
Two printed plates and four small keys. The display screws into the front, the Pi plugs into the display, the sensor clips in at the bottom, behind its own wall, away from the Pi’s heat.
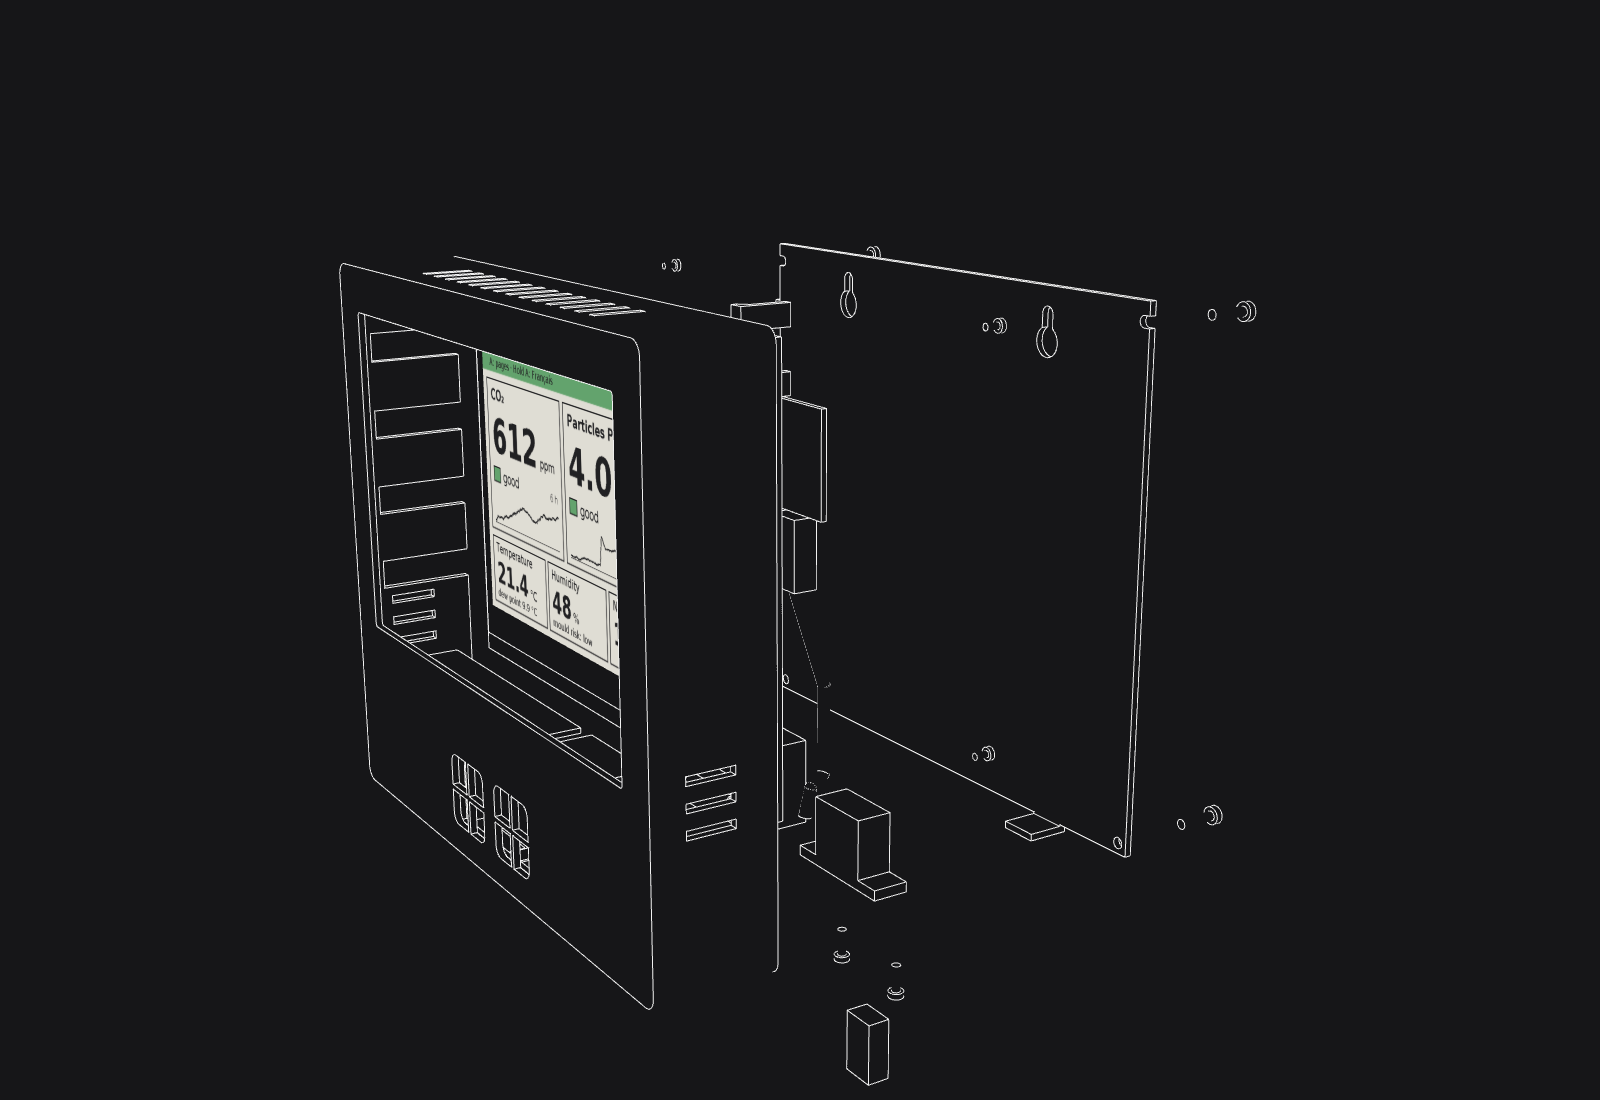 7.3-inch e-paper displaySensirion SEN66, behind its own wallPrinted front, white PETGRaspberry Pi Zero 2 WPrinted back, hangs on two screwsPower socket, plugged from below
I’m an engineer. I spent five years in aerospace at Airbus, working on getting satellites into orbit, then ten years in artificial intelligence. I built this monitor for my own workshop, where a 3D printer and a laser cutter run, and I test things before I promise them.

Engineer: five years in aerospace at Airbus, then ten in artificial intelligence. Designs and builds the monitor.

Product testing, support and extraction: tries each version before it reaches backers, and helps them build theirs. Years of plumbing behind him, and ducting air follows the same rules as piping water.
Marketing and relations: the campaign, and the people who back it.
A crowdfunding campaign on MakerWorld. Backers receive the enclosure files and an illustrated build guide, and buy their own electronics. The funding goal covers everything needed to build one; each stretch goal adds the next feature.
What’s new Everything to build the monitor yourself, on the wall or on its stand, and to install it without typing a single command. Alerts reach your phone.
The wall case and a desk stand, the illustrated guide, the parts list, an SD-card image you flash with Raspberry Pi Imager, and the workshop page on any screen in the house. The software is open source.
Delivered the day after the campaign; the SD-card image within 2 weeks
What’s new If you use Home Assistant, the free home-automation app, the monitor appears in it by itself, with all its readings and the state of the workshop.
Use them with your other devices: for example, switch on a fan or an air purifier when the air gets worse, or get a notification on your watch. Nothing to set up. To be finished and tested before the launch.
Delivered the day after the campaign, with the files
What’s new The monitor turns the extractor on by itself, through a smart plug, during a job or when the air rises.
Then it checks that the air comes back. The plug is an off-the-shelf one: nothing on mains power inside the case. Each plug is tried with a real extractor before it is promised.
Delivered 4 weeks after the campaign
What’s new Print the parts that put an extractor in your machine's duct: it pulls the room's air and the machine's fumes, and sends them out of the window.
For any machine with a 100 mm air outlet, an enclosed 3D printer or a laser. The fan and the valve are off-the-shelf parts; everything else is printed.
Delivered 6 weeks after the campaign
What’s new Ask your AI assistant (Claude, ChatGPT, OpenClaw, Hermes Agent, with any model, DeepSeek included) how the air is, what happened during the last print, or to switch the extraction on. It acts only once you confirm on the monitor.
A small server on the Pi, off by default, speaks MCP, the open standard these assistants use to reach tools. Each assistant is tried before it is named at launch.
Delivered 6 weeks after the campaign
What’s new The monitor talks to IKEA's smart home: a lamp shows the air colour across the room, a sensor knows the window is open, a button starts the extraction.
Through IKEA's DIRIGERA hub, the monitor uses IKEA smart products you may already have. Each one is tried before it is named.
Delivered 8 weeks after the campaign
What’s new A colour screen you touch, in place of the e-paper display, for the charts and the log under your finger.
A 7-inch touchscreen on the same Pi, with its own printed front. The e-paper display stays the standard.
Delivered 12 weeks after the campaign
What’s new The monitor also measures formaldehyde, the gas given off when you laser-cut plywood, with a small sensor you plug in.
Laser-cut plywood and MDF give off formaldehyde, which the main sensor does not see. A small Sensirion SFA40 board plugs into the display’s second port, with no soldering; its place is already in every case, behind a small grille. It flags a rise; it does not prove the air is safe. Only if it passes its test inside the case: if it does not, this goal goes to the vote.
Delivered 8 weeks after the campaign
What’s new Backers choose the next goal, by vote.
More languages, or printers of other brands, such as Prusa or Klipper-based ones.
Delivered 12 weeks after the campaign
What’s new The step after the extraction kit: one extraction for several printers, and several monitors around the room that check, together, that it works.
Ducts and fan sized with an airflow simulation, from their lengths and diameters, so the kit works in many layouts. Several monitors in different spots form a small network: each one measures where it hangs, and together they show whether the fumes are really pulled out everywhere. Every Bambu Lab printer is followed on the same screen; the monitors only read the printers, they never control them. Tried with several printers before it is promised.
Delivered 16 weeks after the campaign
Amounts are proposed. None of the stretch goals is built yet.
Files only, for personal use. The electronics are bought separately.
All of it with a single sensor, the Sensirion SEN66:
| Wire | Goes to |
|---|---|
| Red | 3.3 V, pin 1. Never 5 V: the sensor doesn't take it |
| Black | Ground, pin 6 |
| Blue on the display side, green on the sensor side | Data (SDA), pin 3 |
| Yellow | Clock (SCL), pin 5 |
| The sensor's two other wires | Not used, left free |
The “H” has its header already soldered. With a 32 GB microSD card and a micro-USB power supply
The single sensor. It draws air in at one end and blows it out at the other, on the same face. Sold with a six-wire cable
E-paper, six colours, 800 × 480. The Pi plugs into its back; two Qw/ST ports for sensors
Joins the display's Qw/ST port to the sensor's cable, wire to wire
Between the two grilles, it keeps the air going in apart from the air going out
Its socket is the case's power socket
Short M2 for the display, two M2.5 × 8 for the socket, M3 to close the back, two for the wall
Part of a spool is enough
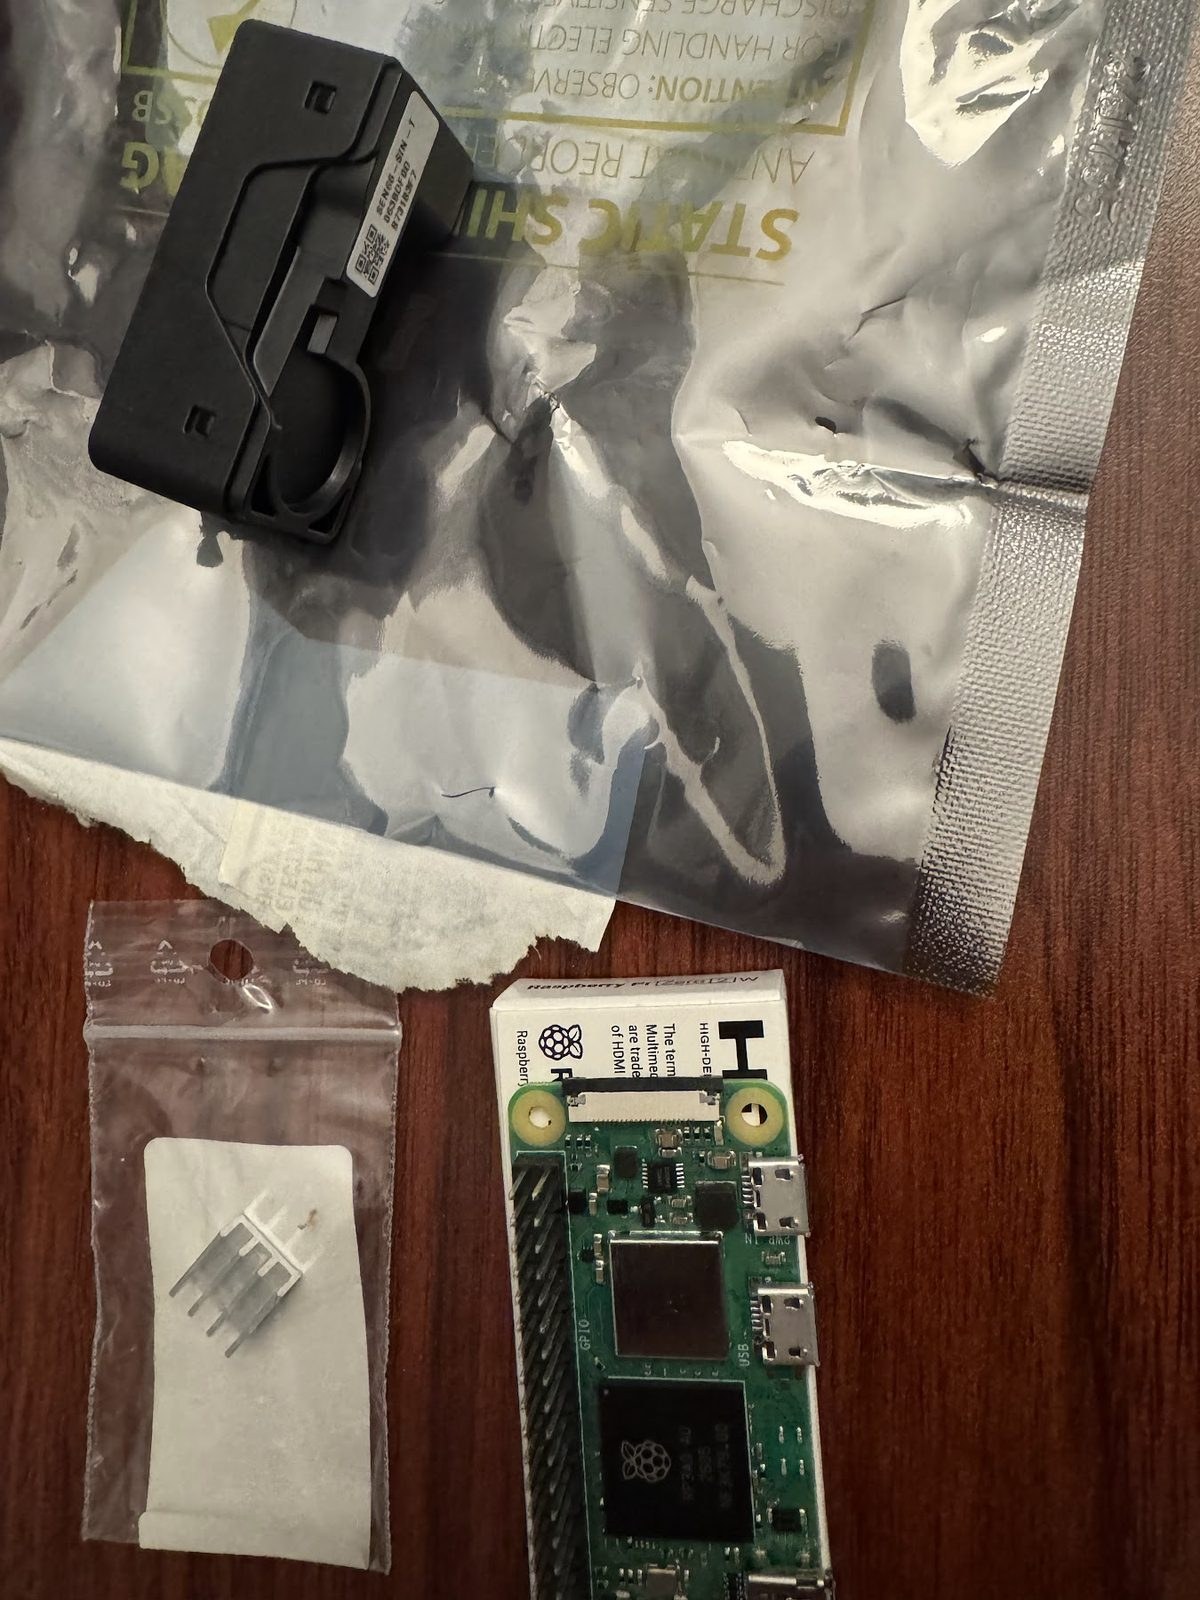
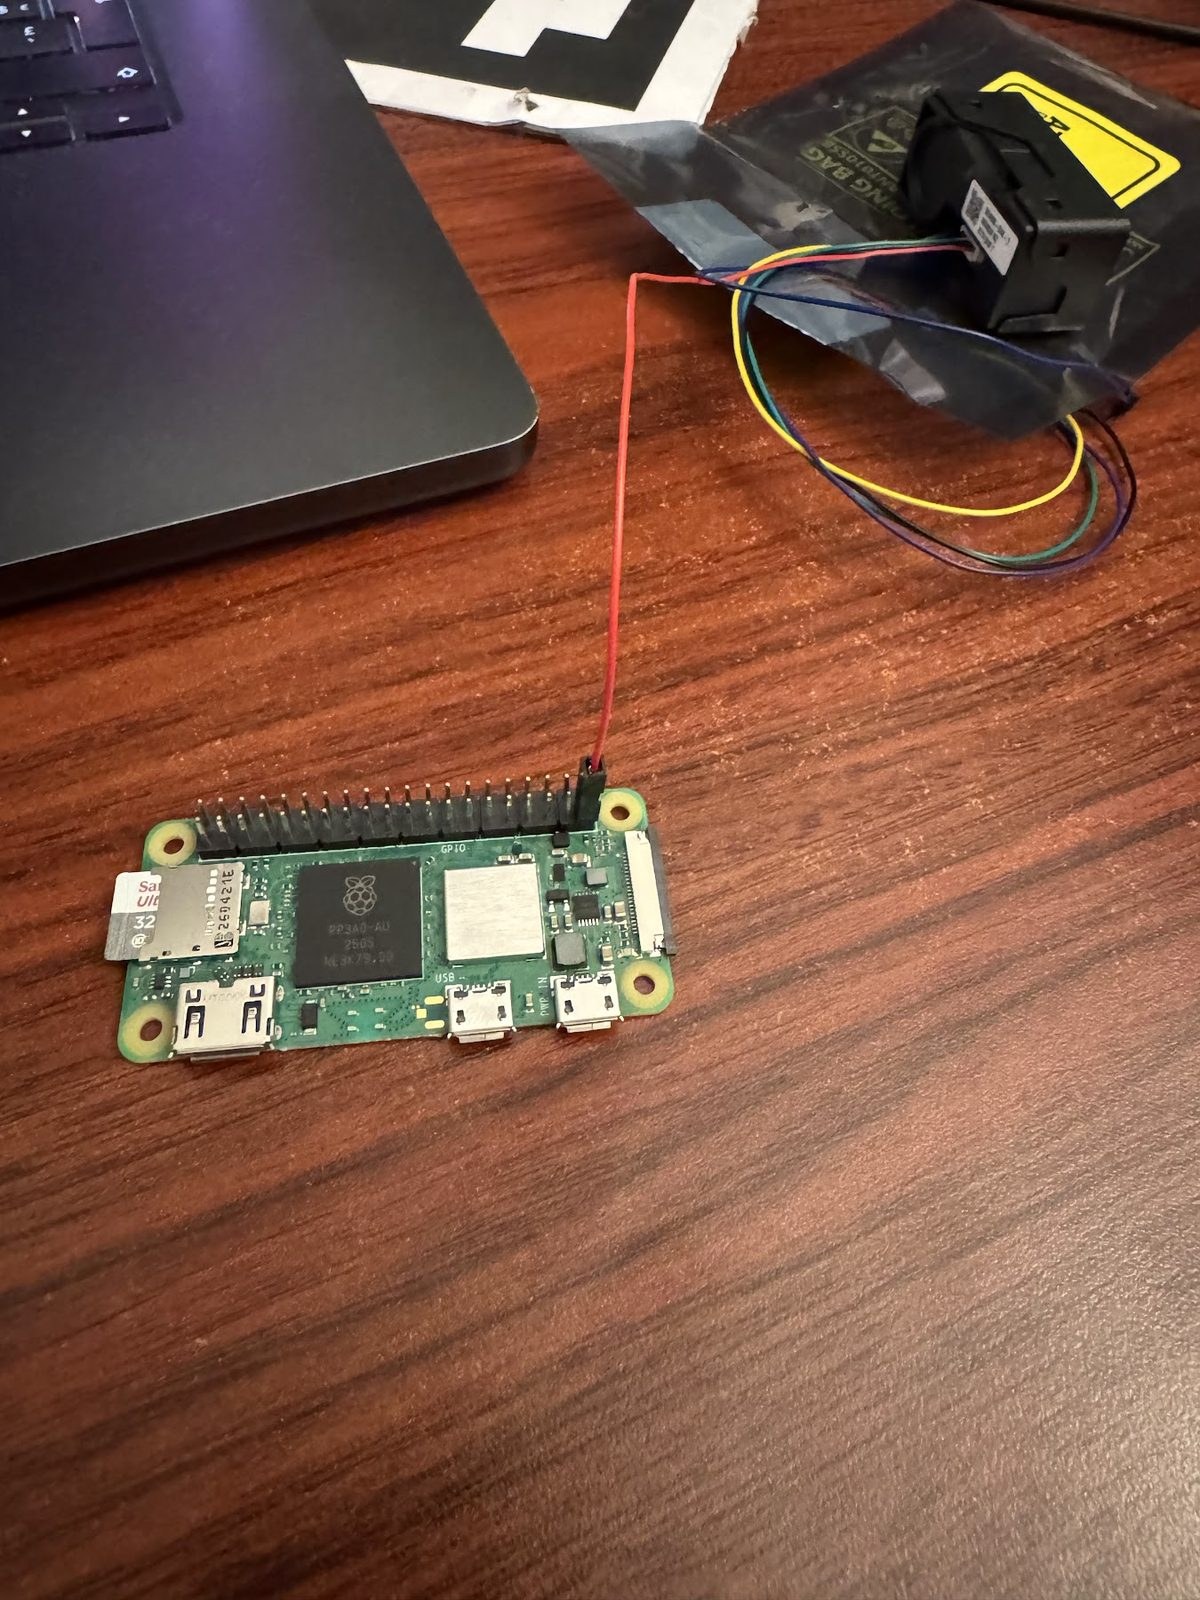
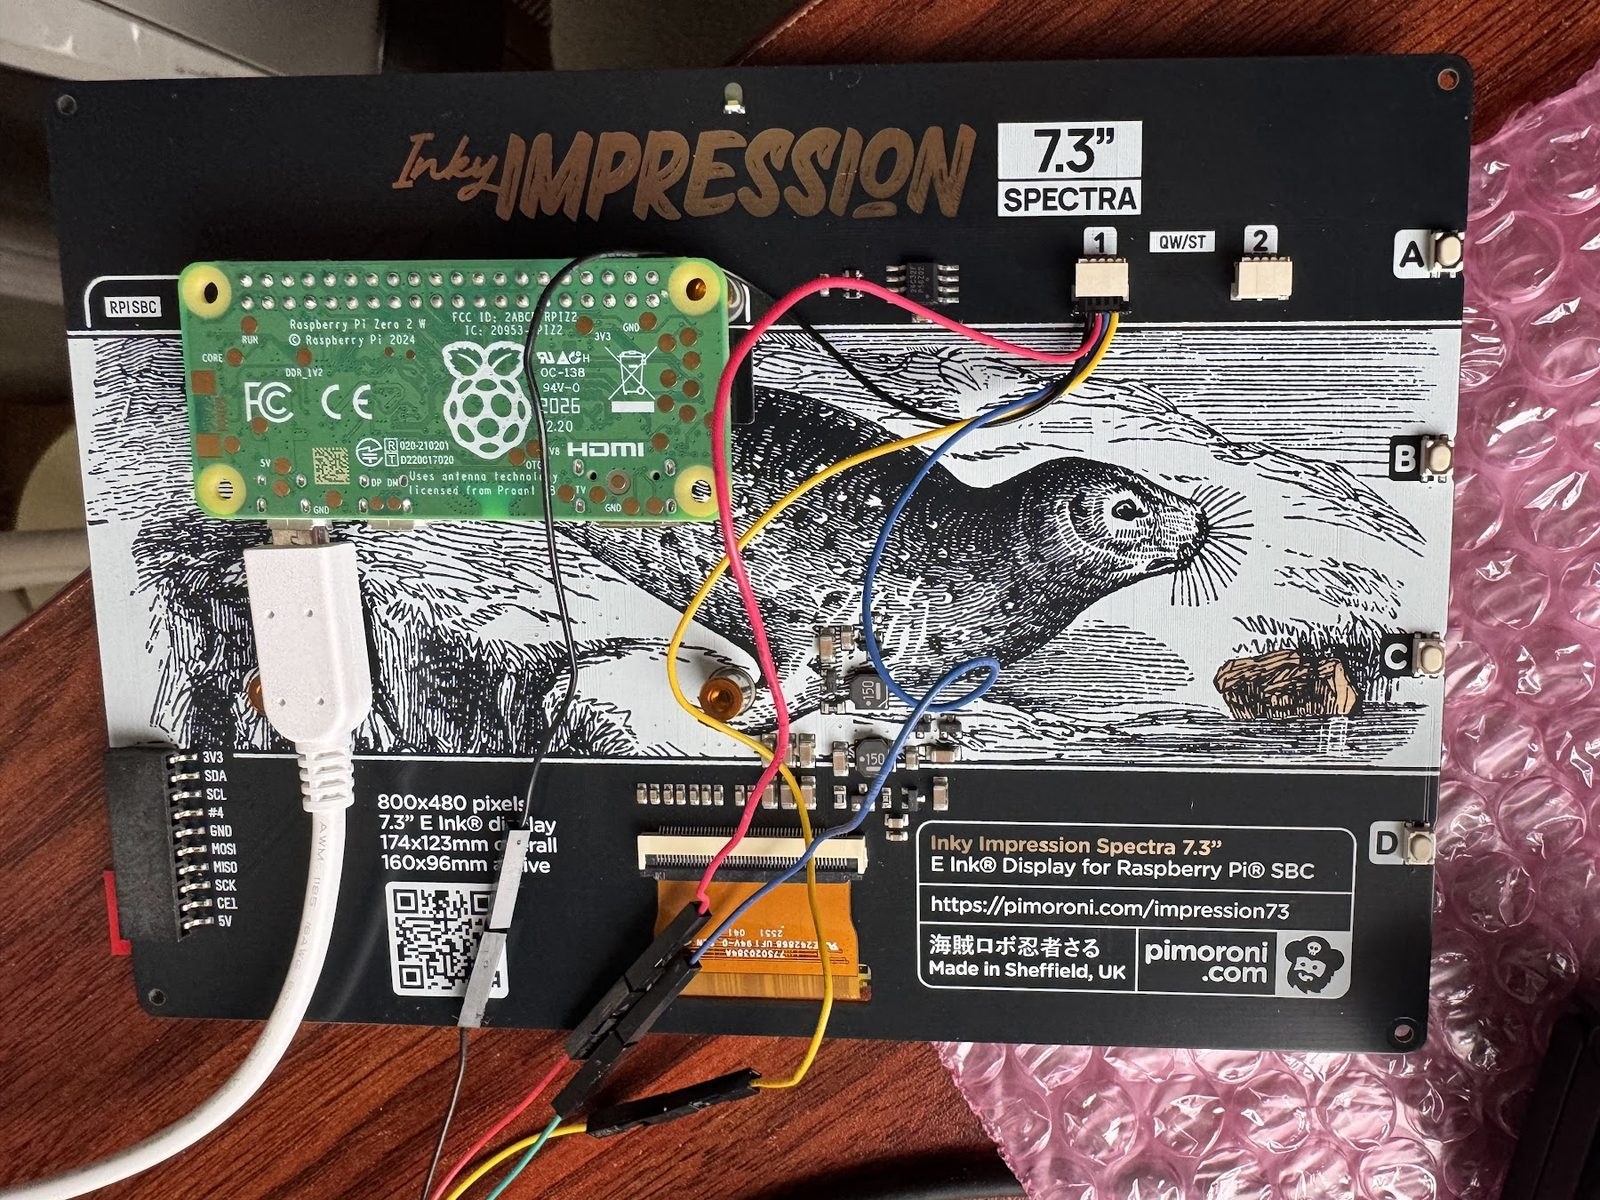
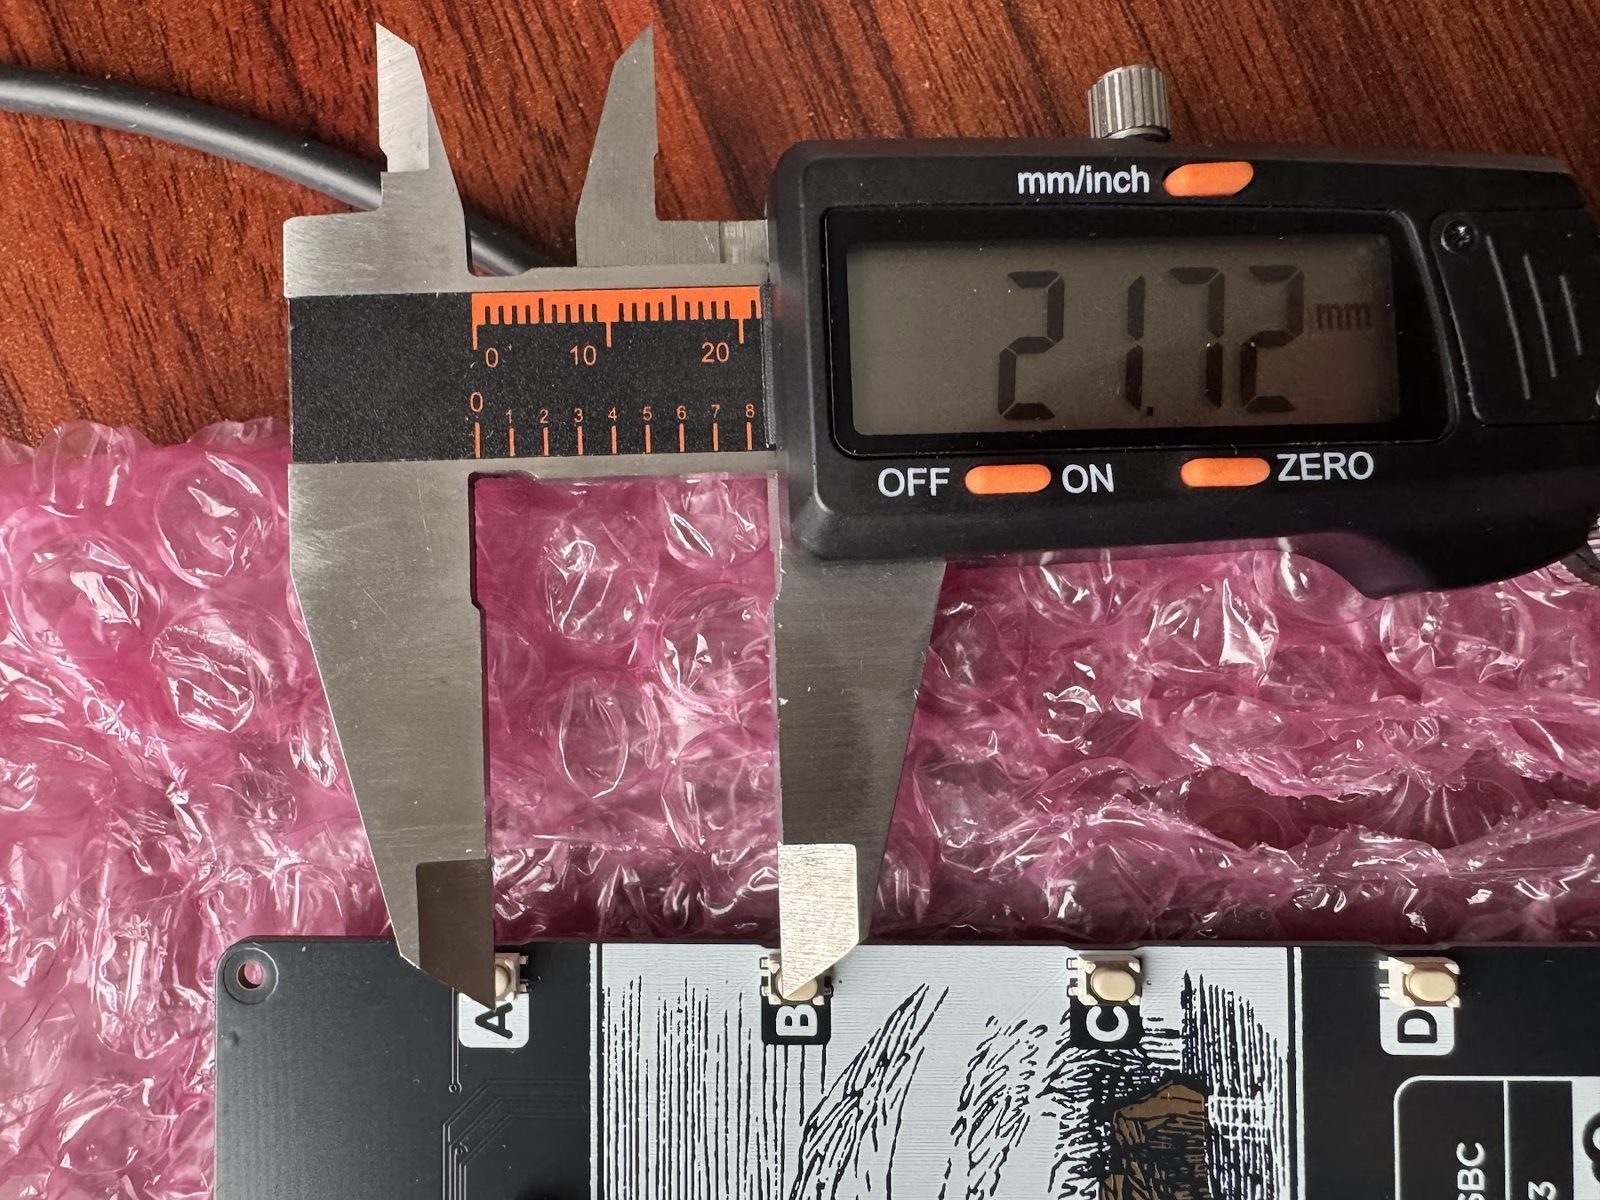
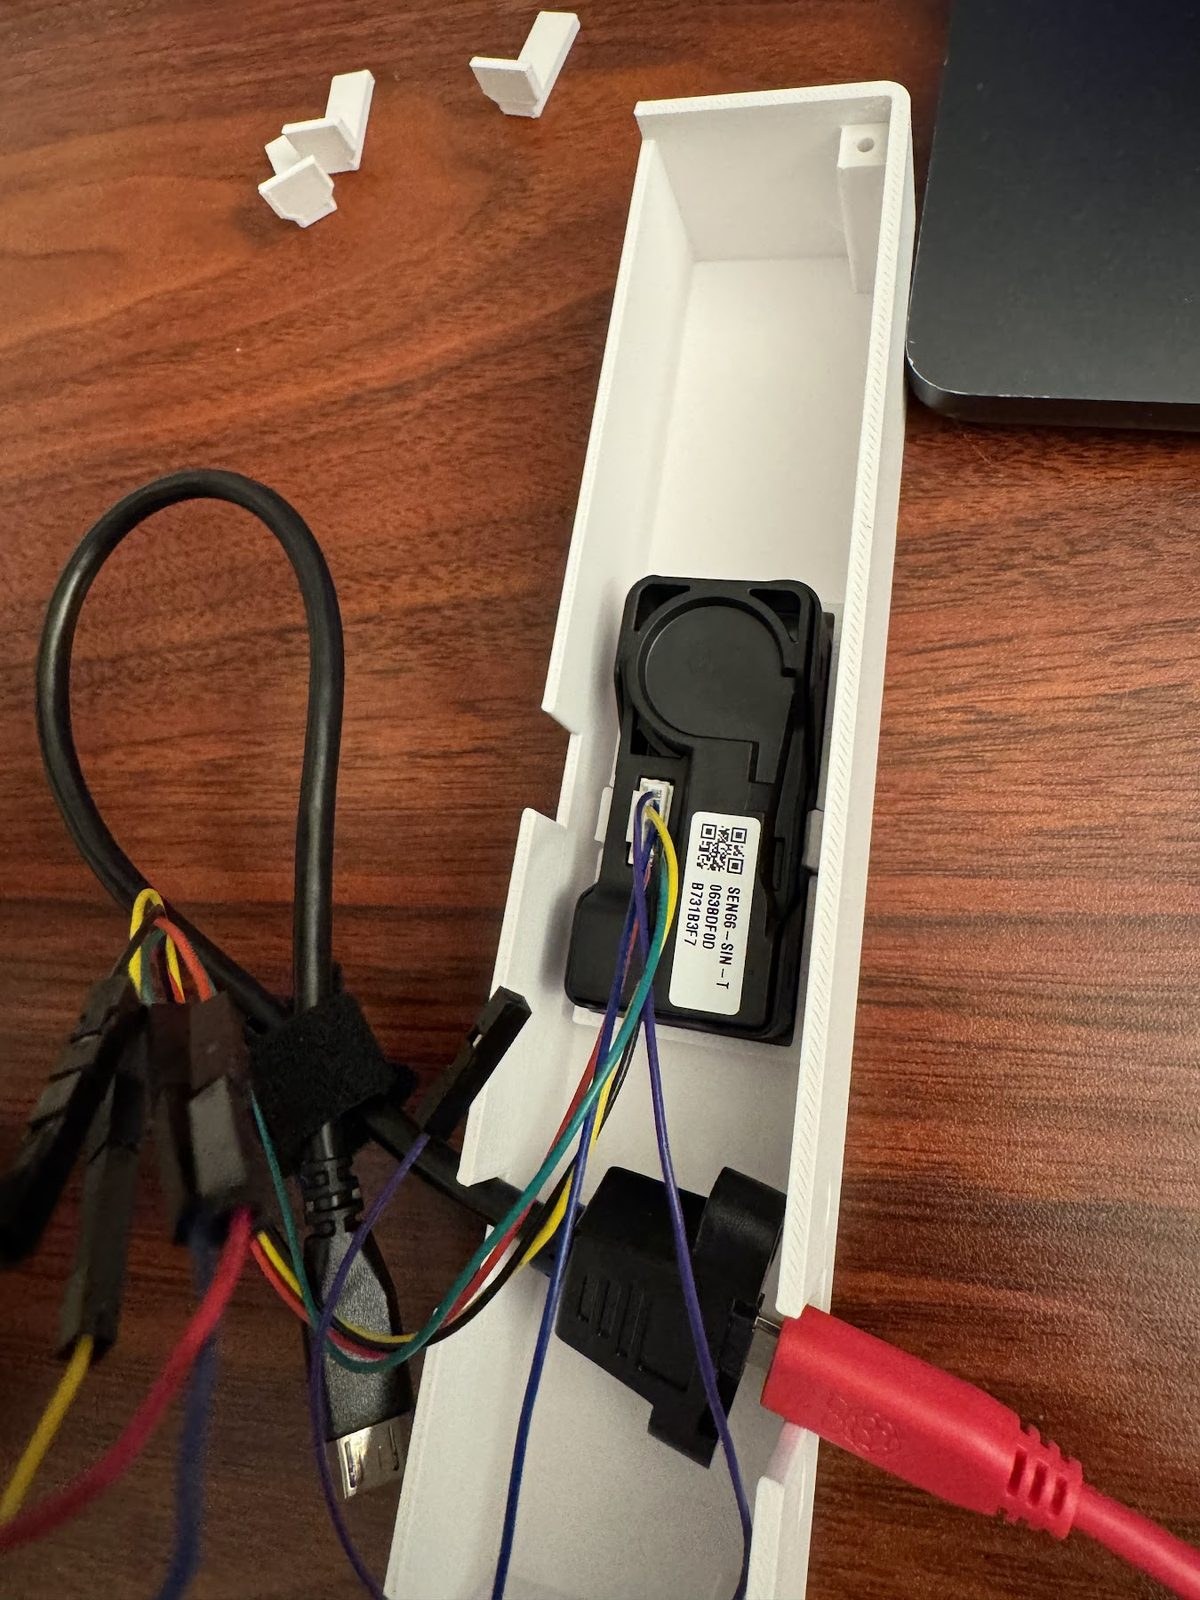
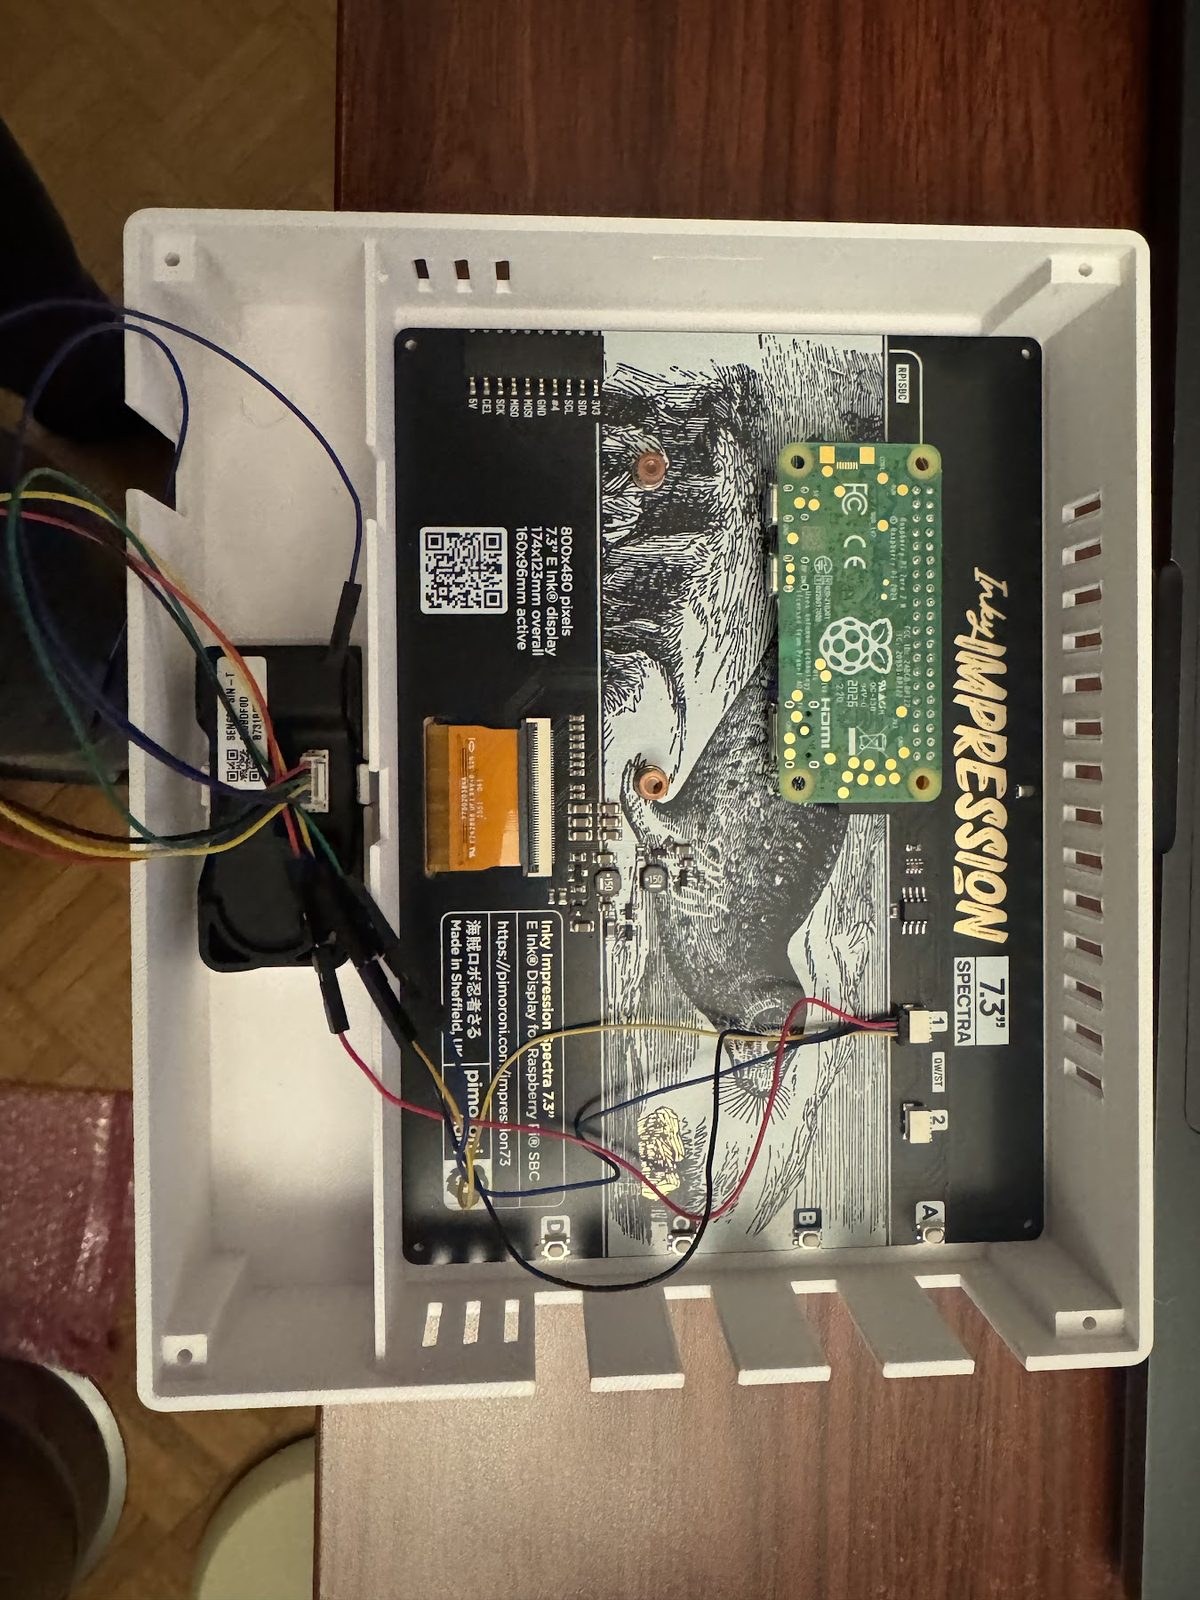
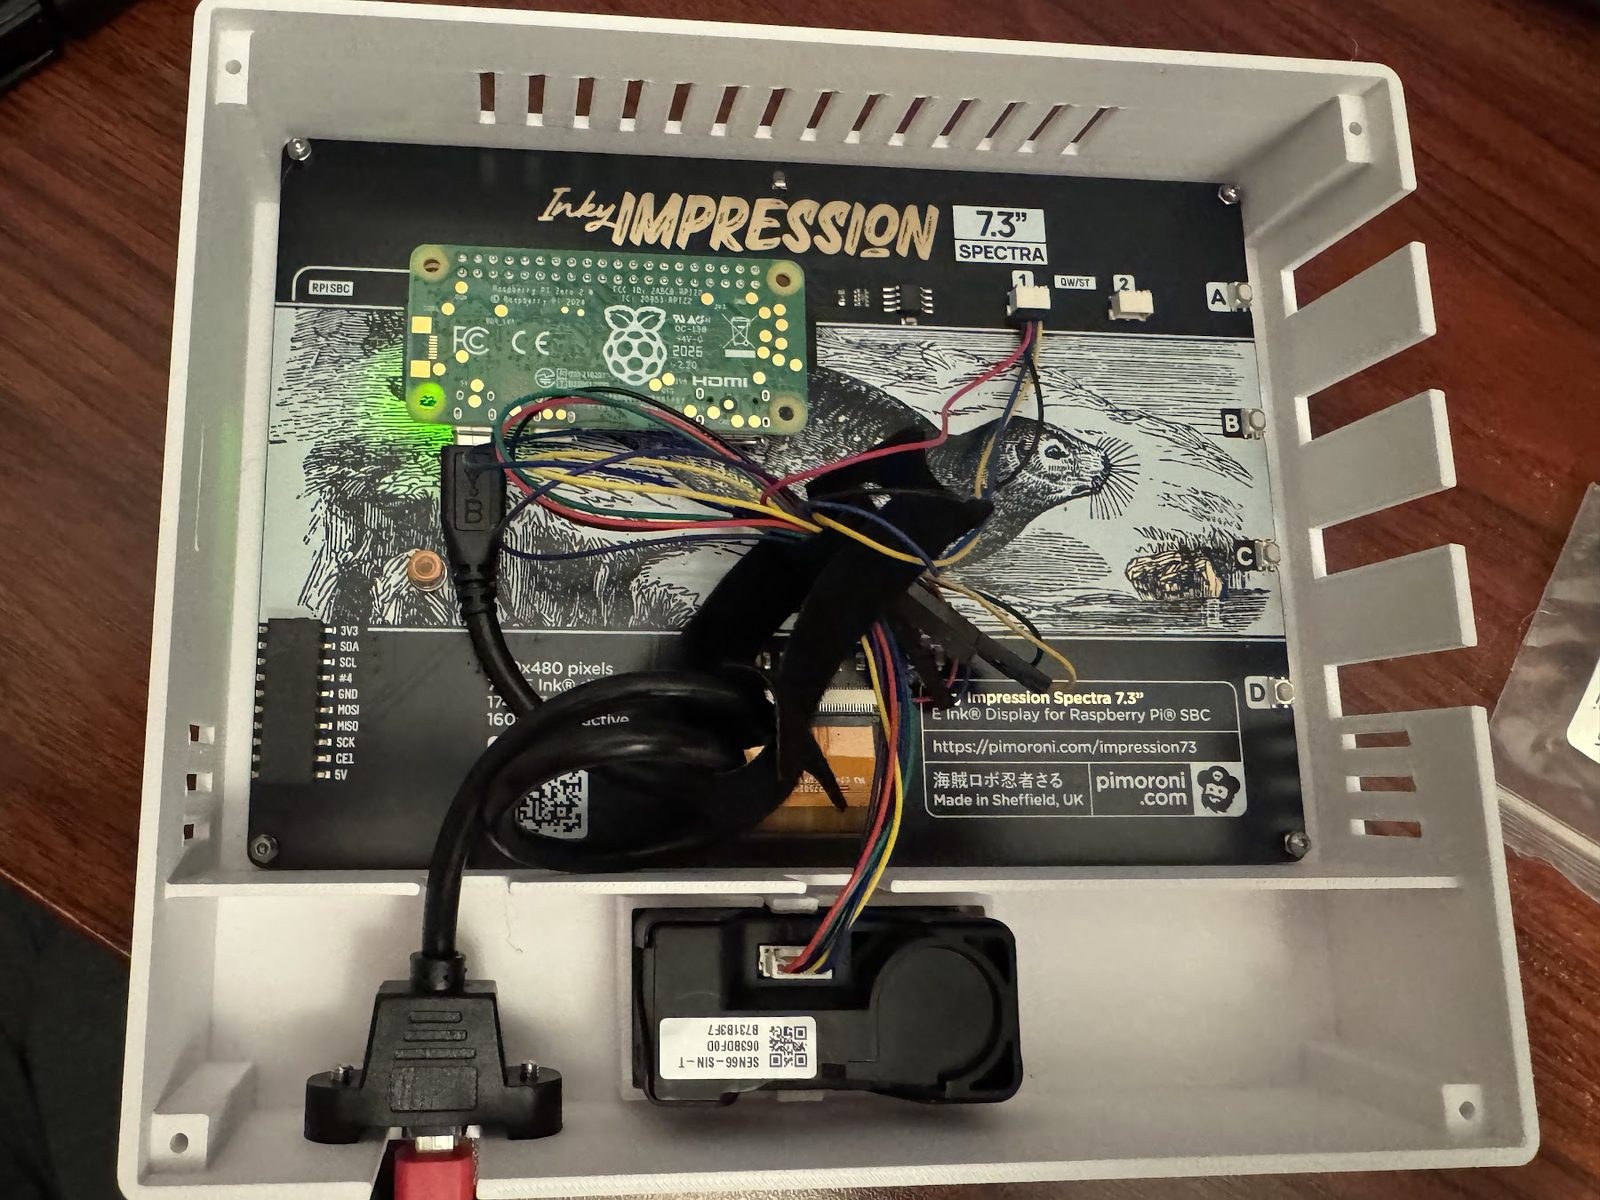
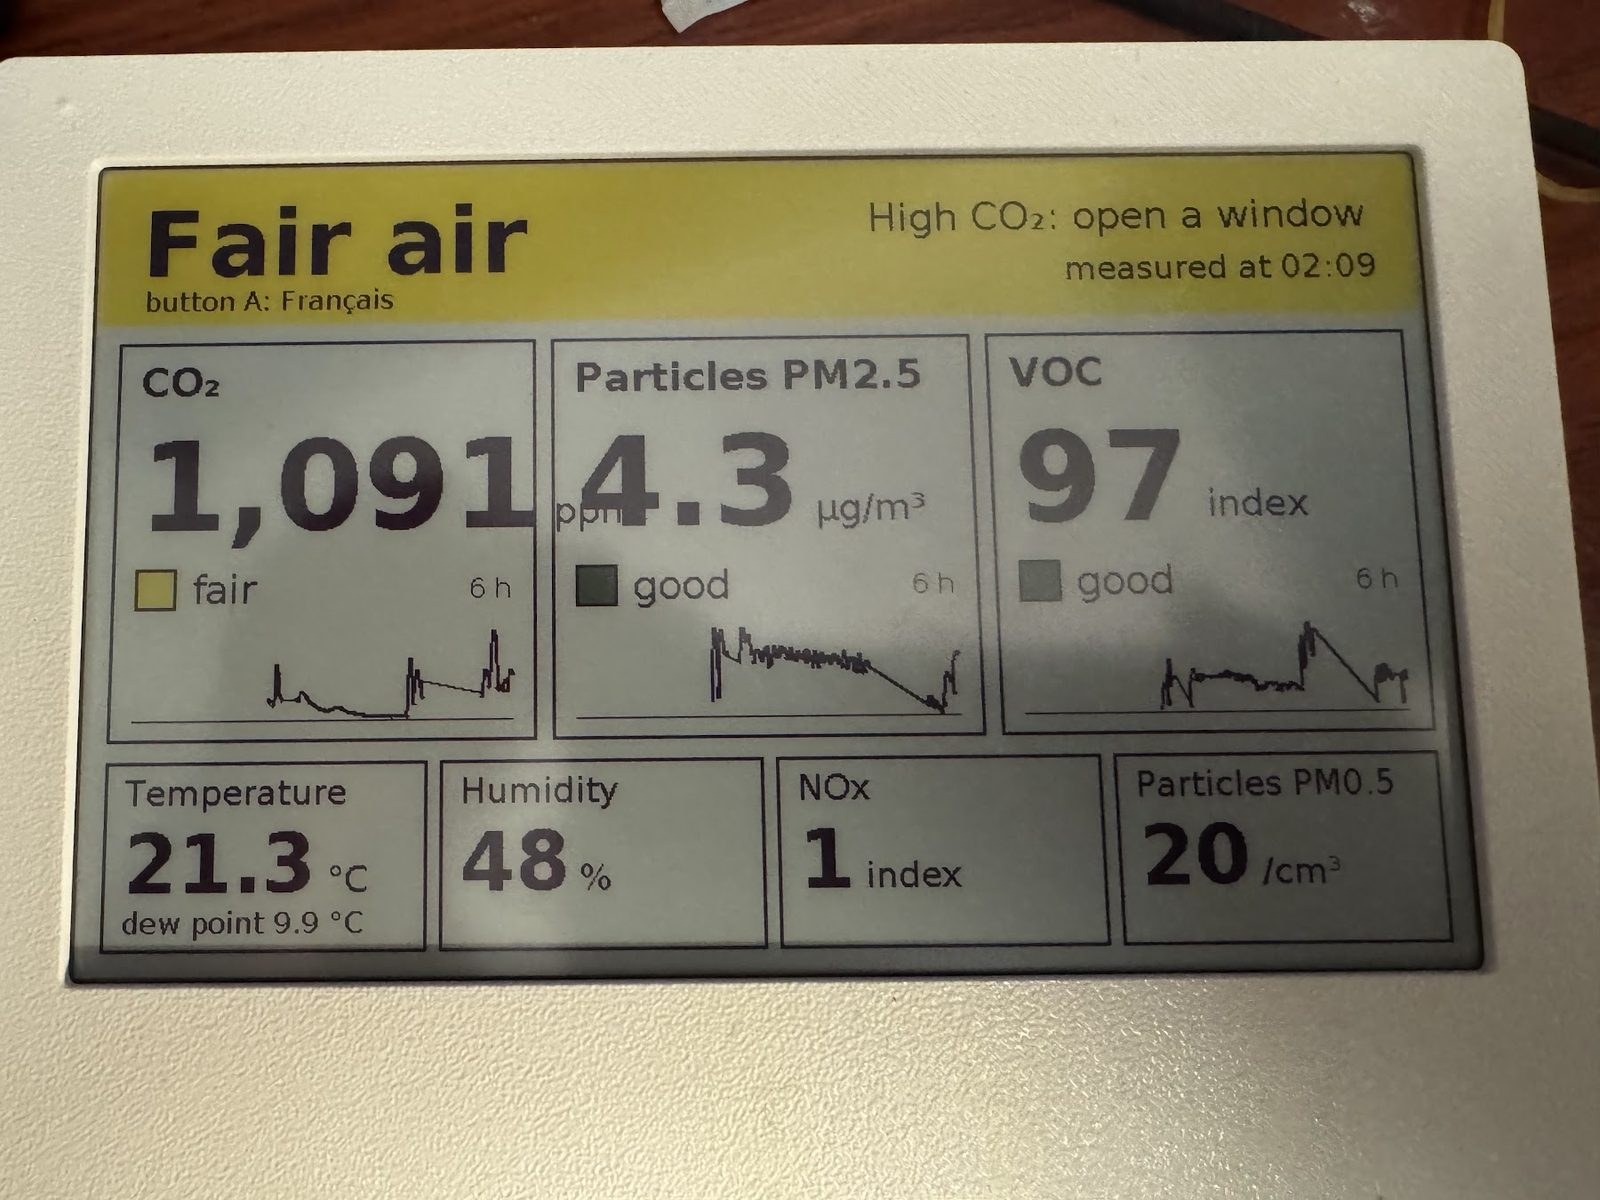
Designed, printed, assembled and tested at home in November 2026. The case is generated by Python scripts from caliper measurements and checked automatically: no part goes through another, everything prints without supports. The software and those scripts were written with AI coding assistants, Claude and Codex, from my measurements and decisions; I chose, printed, assembled and tried it.